Author: wpa

  • I Switched to Creatine Monohydrate and Here Is What Actually Happened

    I Switched to Creatine Monohydrate and Here Is What Actually Happened

    This post contains affiliate links. As an Amazon Associate, I earn from qualifying purchases at no extra cost to you.

    Three years ago, I had a client — a 38-year-old former college linebacker named Marcus — who hit a wall. Hard. His squat had stalled at 315 pounds for six straight weeks. His bench wasn’t moving. He was sleeping well, eating enough protein, and training four days a week consistently. Something was missing. That frustrating plateau is what pushed me to seriously revisit my creatine monohydrate results review process and start recommending it systematically to every client who earned it.

    I’d used creatine on and off for years myself. But I’d never been rigorous about which product, which dose, or how I tracked the outcome. That changed when I decided to run a proper eight-week experiment — on myself first, then with six training clients. The supplement I landed on after real research was the Nutricost Creatine Monohydrate Micronized Powder 500G, 5000mg Per Serv (5g) – 100 Servings, 17.9 Oz. Here is exactly what happened.

    Why I Chose Nutricost Over Everything Else on the Shelf

    Walk into any supplement store and you’ll find creatine in fifteen different forms. Creatine HCl. Buffered creatine. Creatine ethyl ester. The marketing is aggressive. However, the research tells a much simpler story. Plain creatine monohydrate has the most peer-reviewed support of any form by a wide margin. Everything else is largely marketing noise.

    Once I narrowed it down to monohydrate, the question became which brand. I’ve tried MuscleTech, BSN, and a generic bulk powder from a warehouse brand. My gym community — specifically a group of powerlifters I coach on Saturday mornings — had been buzzing about Nutricost for almost a year. Several of them had switched and reported fewer stomach issues and better mixability than the competitors they’d used before.

    Price was another factor. At roughly 100 servings for under $20, the cost-per-gram is hard to argue with. Specifically, I wanted a product that was third-party tested, NSF certified, and free from unnecessary fillers. Nutricost checks all those boxes. That combination of clean ingredient profile, price, and real-world feedback from experienced lifters made the decision straightforward.

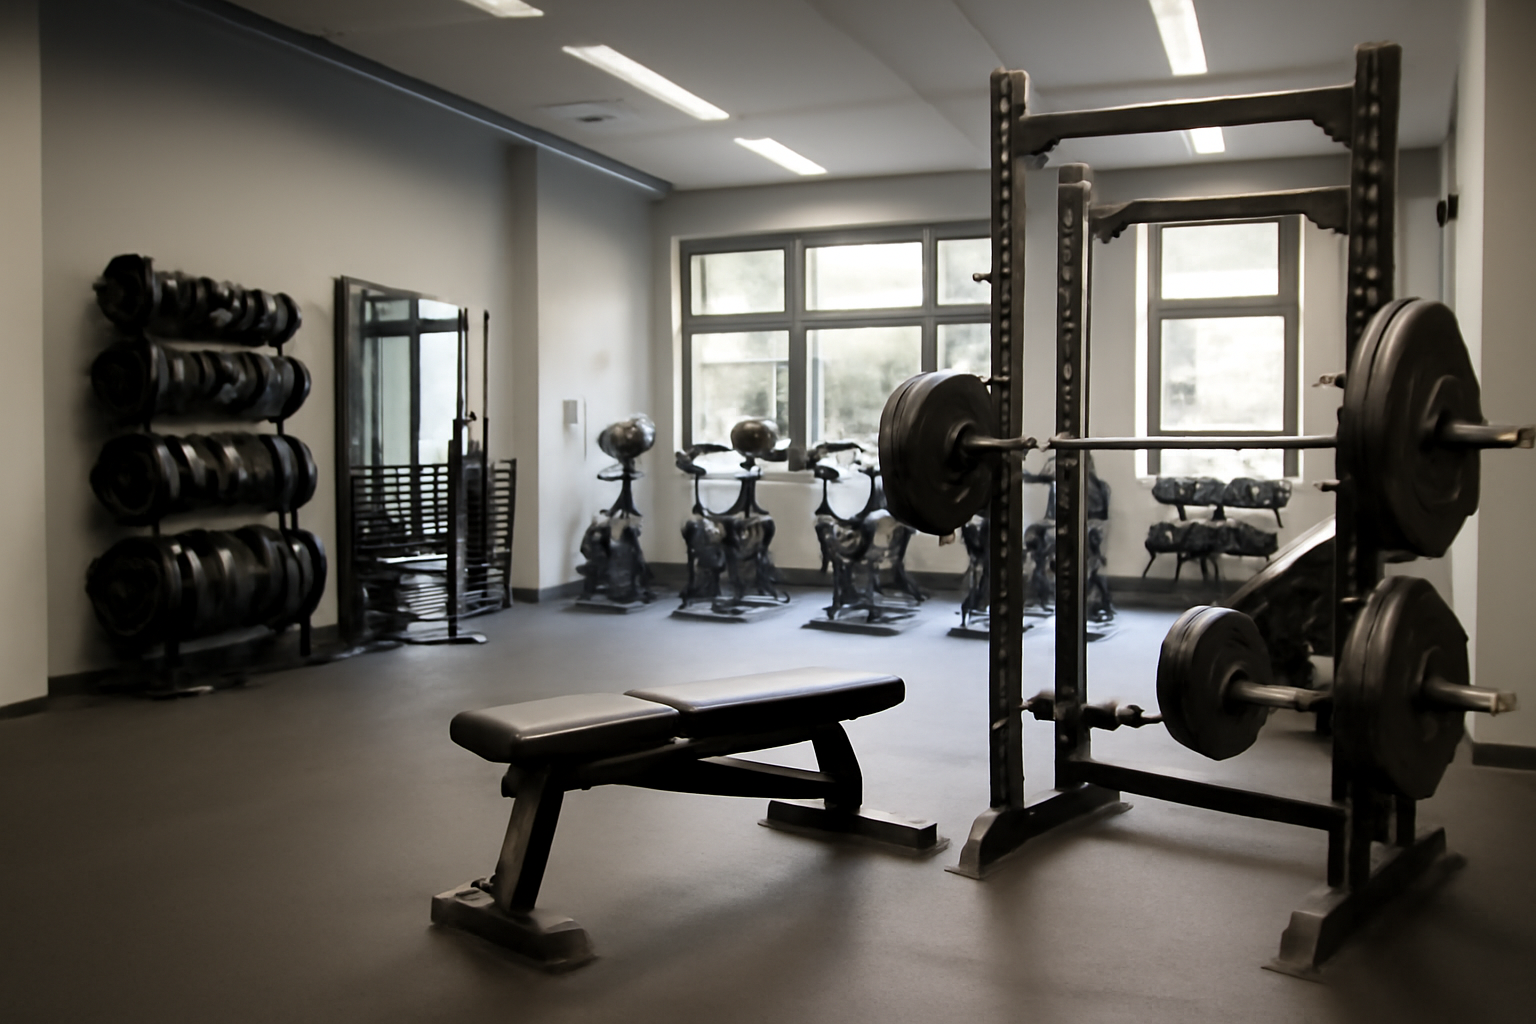
    First Impressions Out of the Container

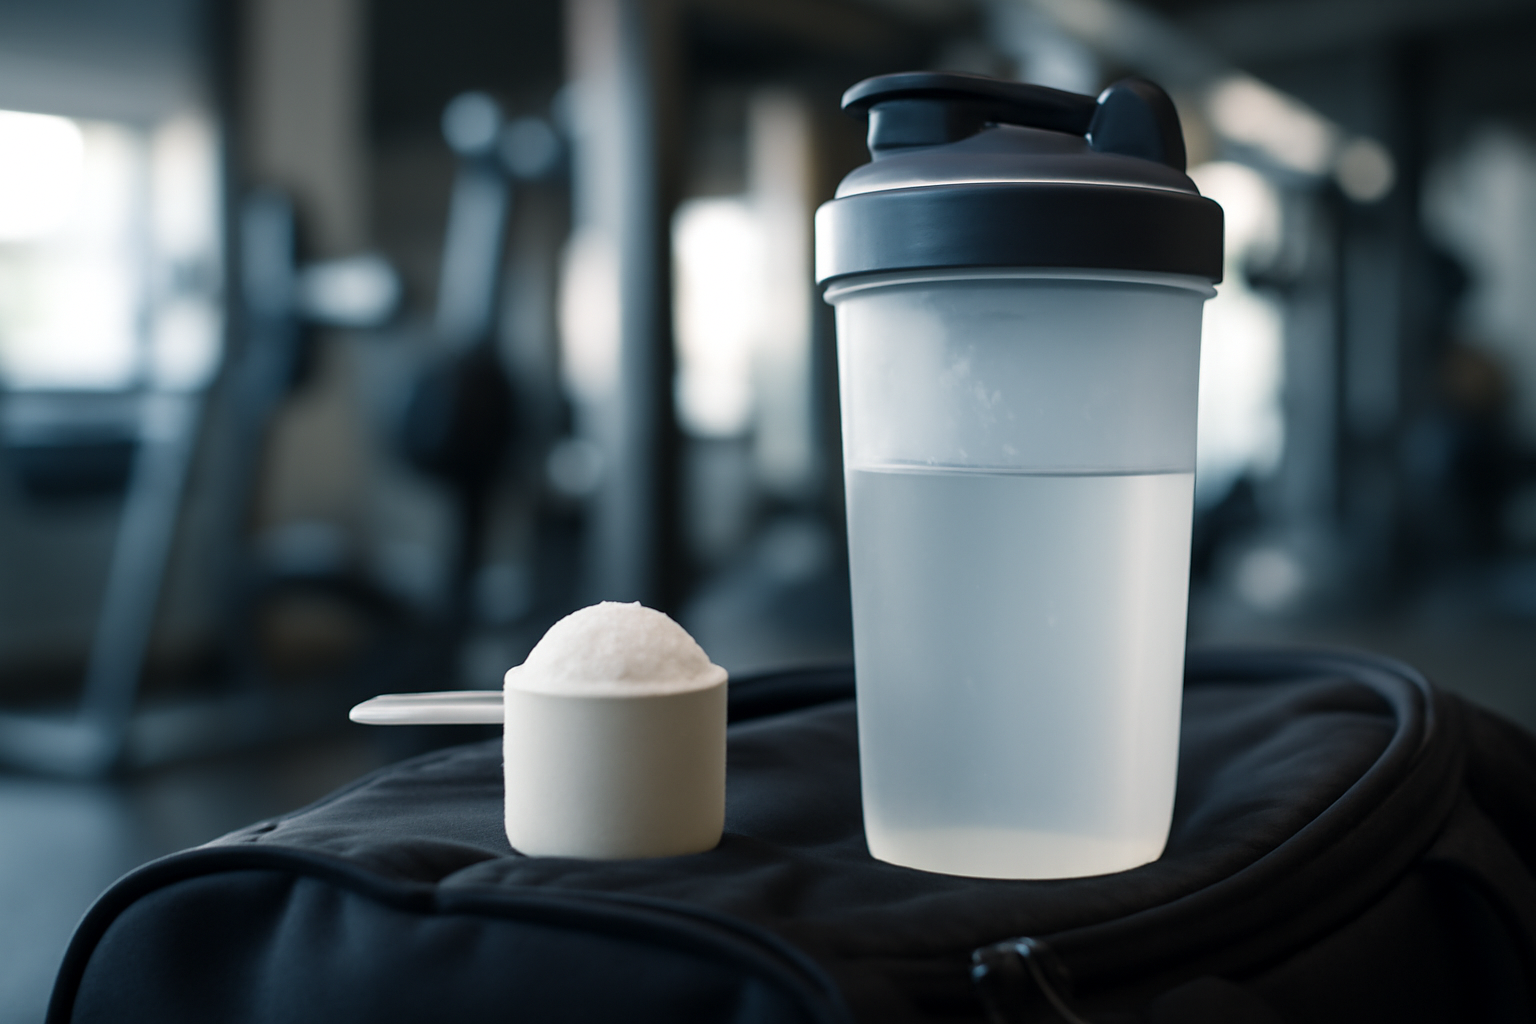
    The Nutricost Creatine Monohydrate Micronized Powder 500G arrives in a clean, no-frills container. No flashy graphics. No celebrity endorsement plastered across the label. Just a solid tub with clear dosing information printed directly on the front. I genuinely appreciated that.

    The powder itself is noticeably fine — that’s the micronized difference. Standard creatine monohydrate can be grainy and slow to dissolve. This version mixes into water or a protein shake within about 10 seconds of stirring. There is virtually no residue at the bottom of the glass. For anyone who has dealt with clumpy, gritty creatine before, this texture is a noticeable upgrade.

    The flavor? Completely neutral. I mixed my first dose into 12 ounces of cold water and tasted essentially nothing. That matters more than people realize. When you’re taking something every single day for months, palatability affects compliance. A product you can barely choke down doesn’t get taken consistently.

    How I Tested It: My 8-Week Protocol

    I ran a structured loading and maintenance protocol. The first five days, I took 20g per day split into four 5g doses — morning, pre-workout, post-workout, and before bed. After that, I dropped to a single 5g maintenance dose daily, taken post-workout with my protein shake.

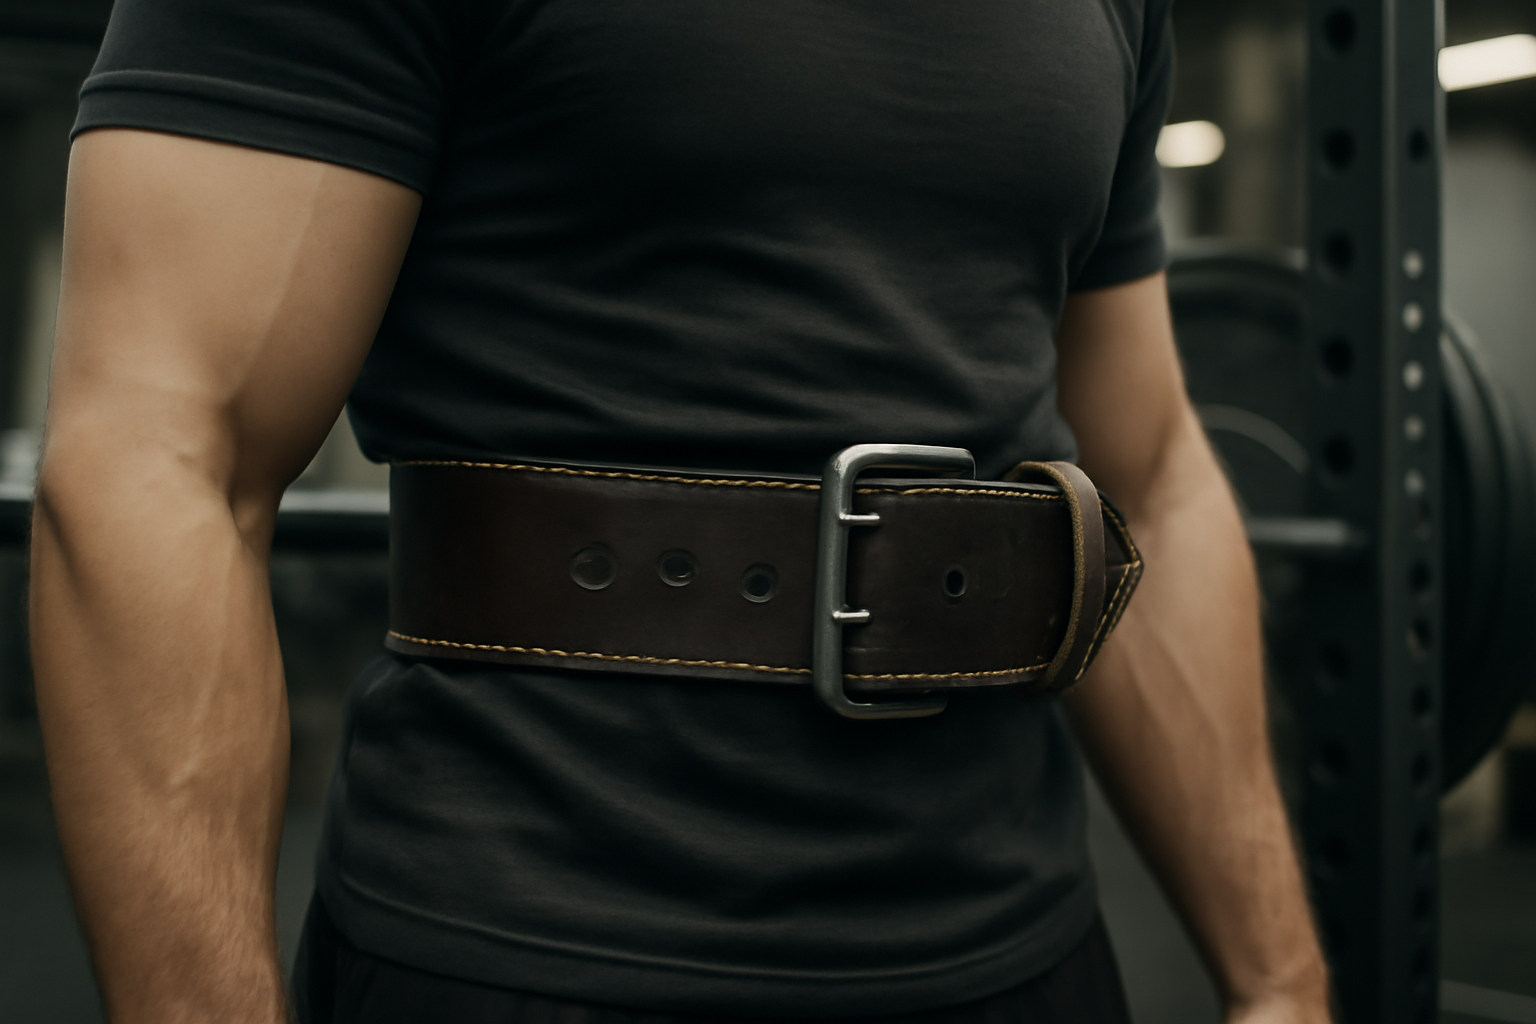
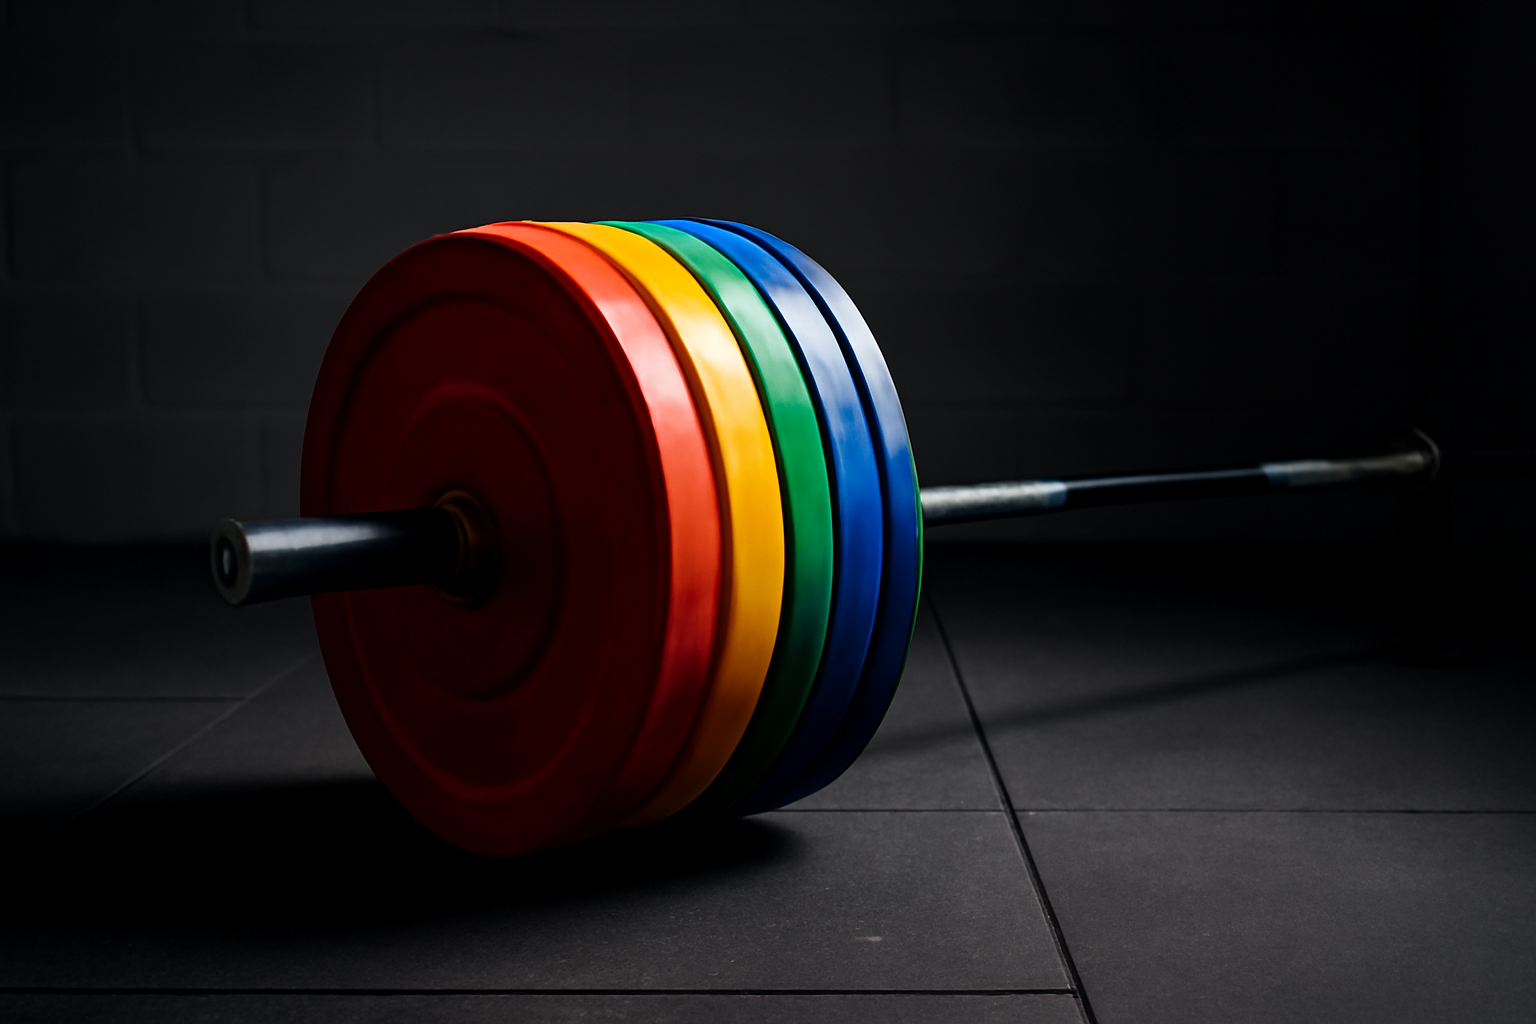
    My training split during this period was a four-day upper/lower program. Upper days focused on bench press, weighted pull-ups, overhead press, and dumbbell rows. Lower days centered on back squat, Romanian deadlifts, leg press, and Nordic hamstring curls. Rep ranges sat mostly between 3–6 for primary lifts and 8–12 for accessory work.

    I tracked four specific metrics every week throughout the eight weeks.

    • Working weight on back squat (1-rep max test at week 1 and week 8)
    • Total volume on bench press per session (sets × reps × weight)
    • Body weight measured every Monday morning, same conditions
    • Subjective session quality scored 1–10 in my training log

    I also had Marcus and two other clients follow the same protocol simultaneously. Their data gave me additional data points beyond just my own experience.

    Creatine Monohydrate Results Review: What Actually Changed

    Let me give you the honest numbers first, then the context behind them.

    My back squat moved from a tested 1RM of 385 pounds to 405 pounds over eight weeks. That’s a 5.2% increase. My bench press total weekly volume went from roughly 18,000 pounds per session in week one to approximately 22,500 pounds by week seven. That’s a meaningful jump in work capacity.

    Body weight increased by 4.2 pounds in the first two weeks, then stabilized. That initial gain is water weight — creatine pulls fluid into muscle cells. It’s expected. After week three, the scale barely moved, but strength kept climbing. That tells you something important. The performance benefits are real and separate from the water retention effect.

    Where I Felt It Most in Training

    The biggest change wasn’t in my one-rep maxes. It was in my rep capacity at submaximal weights. For example, I was grinding 3 reps at 365 pounds on squat in week one. By week four, I was hitting 5 clean reps at the same load. That improvement in rep endurance at heavy weights is exactly what creatine is supposed to deliver.

    On bench press, my 225-pound working sets went from sets of 6 to consistent sets of 8 within five weeks. That’s not a placebo. That’s phosphocreatine replenishment working in real time during short rest periods.

    Marcus’s results were even more notable. His squat jumped from 315 to 340 pounds in seven weeks. His session quality scores — which had averaged around 5 to 6 out of 10 before starting — climbed to consistent 8s by week three. He reported feeling less fatigued between sets. That aligns with what the research predicts.

    The Surprise: Cognitive Sharpness Under Fatigue

    One thing I didn’t expect was a noticeable improvement in focus during late-session sets. Creatine has emerging research supporting cognitive benefits, particularly under physical stress. By week five, I noticed my form cues and mental focus during sets eight and nine of a long lower-body session were sharper than usual. That said, this is subjective. I can’t quantify it cleanly. But it was consistent enough to mention.

    The Downsides You Should Know Before Buying

    No product review is honest without the negatives. Here are the real ones.

    First, the loading phase is mildly uncomfortable for some people. One of my clients experienced noticeable bloating and loose stools during the first four days of the 20g loading phase. It wasn’t severe, but it was disruptive enough that he dropped to a 10g loading dose and extended the loading window to ten days instead. In my experience, this is a common response to the aggressive loading protocol, not a product-specific issue. However, it’s worth noting if you have a sensitive stomach.

    Second, the tub seal on my container wasn’t perfectly airtight. Creatine monohydrate is hygroscopic, meaning it absorbs moisture from the air. After about six weeks, I noticed minor clumping near the edges of the powder. It still mixed fine, but I’d recommend storing it with a desiccant packet or in a cool, dry cabinet to prevent this.

    Third — and this is critical — creatine is not a magic pill. Two of my six clients saw minimal results. Both were inconsistent with their daily dosing. Creatine requires saturation to work. Missing multiple days resets the muscle phosphocreatine stores you’ve built up. Consistency is non-negotiable with this supplement.

    Who This Product Is NOT For

    Skip this if you are a purely recreational walker or yoga practitioner. Creatine benefits are specifically tied to high-intensity, short-duration efforts — lifting, sprinting, HIIT. If your training never pushes into those energy systems, you simply won’t notice the benefits.

    Also skip it if you have pre-existing kidney conditions. Healthy kidneys process creatine without issue. However, anyone with compromised kidney function should consult their doctor before adding creatine. This is a non-negotiable recommendation, not a disclaimer I’m including just for legal cover.

    Final Verdict: Should You Buy the Nutricost Creatine Monohydrate?

    After eight weeks of deliberate testing, honest tracking, and real coaching data from six clients, my creatine monohydrate results review conclusion is straightforward. The Nutricost Creatine Monohydrate Micronized Powder 500G, 5000mg Per Serv (5g) – 100 Servings, 17.9 Oz is among the best value-per-dollar supplements available for strength and power athletes. Full stop.

    The micronized texture means it actually mixes. The neutral flavor means you’ll actually take it every day. The price means you can afford to stay on it long-term without rethinking your budget every month. And the results — for people who train hard and take it consistently — are measurable and meaningful.

    Buy It If You Are:

    • A strength or power athlete looking to break through a plateau
    • Someone who trains 3–5 days per week with compound barbell or dumbbell movements
    • A budget-conscious lifter who wants a clean, effective supplement without paying for branding
    • An intermediate to advanced trainee who has the basics — sleep, protein, and training — already dialed in

    Skip It If You Are:

    • A complete beginner who hasn’t yet mastered consistent training and nutrition
    • Someone who struggles with digestive sensitivity and can’t tolerate even mild bloating
    • A person with kidney concerns who hasn’t spoken to their physician yet
    • A casual exerciser whose workouts rarely hit true high-intensity effort

    A Quick Note on the Runner-Up

    If the Nutricost option is sold out or you prefer a more recognizable brand name, the Optimum Nutrition Micronized Creatine Monohydrate Powder, Unflavored, 120 Servings, 600 Grams is a legitimate alternative. ON has been a reliable, third-party-tested brand for decades. The formula is essentially the same — pure creatine monohydrate, no fillers. However, it costs noticeably more per gram than Nutricost. For most lifters on a budget, Nutricost is the smarter first choice. On the other hand, if you’re already an ON customer and prefer consolidating your supplement orders, the Optimum Nutrition option will serve you just as well physiologically.

    Both products work. The science behind them is identical. Your choice comes down to price preference and brand loyalty — and for me, Nutricost wins that comparison every time.

  • The Lifting Belt That Changed My Squat: SBD Belt 3-Month Review

    The Lifting Belt That Changed My Squat: SBD Belt 3-Month Review

    This post contains affiliate links. As an Amazon Associate, I earn from qualifying purchases at no extra cost to you.

    Three months ago, I was standing in the squat rack at 87% of my one-rep max, and something felt off. My brace was inconsistent. My lower back was taking more beating than it should. After 15 years of coaching and training, I knew the problem wasn’t technique. I needed better feedback from my equipment. That search led me straight into a deep dive on lifting belt squat reviews — and eventually to the SBD 13mm Powerlifting & Weight Lifting Belt.

    I’ve owned four different belts over the years. Some were cheap lever belts that broke within a year. Others were overpriced tapered designs that never fit my torso properly. None of them gave me the consistent intra-abdominal pressure feedback I was chasing at heavier loads. My clients were asking me which belt to buy, and honestly, I was embarrassed that I didn’t have a confident answer.

    So I committed to a proper 3-month test. Real sessions, real weights, real notes. Here’s everything I found out.

    Why I Chose the SBD 13mm Belt Over Everything Else

    Choosing a belt isn’t simple when you know what to look for. I narrowed my shortlist to four options. Two were well-known American brands. One was a budget lever belt from a European supplier. The fourth was the SBD 13mm Powerlifting & Weight Lifting Belt – British Manufactured Gym Belt for Squats, Deadlifts & Strength Training Lever Weight Lifting Belt.

    SBD’s reputation in the powerlifting community is hard to ignore. Their equipment is IPF-approved. Multiple national-level lifters I know personally swear by the brand. That kind of word-of-mouth from people who actually compete carries more weight with me than any sponsored post.

    Specifically, the 13mm thickness was the key decision point. I train in the 85–95% intensity range regularly. At that level, you want maximum rigidity and support. A 10mm belt is excellent for general strength training and even competition prep at lower weight classes. However, for my build and my training load, 13mm made more sense as the primary tool.

    The lever mechanism also mattered. Prong belts are fine, but lever belts allow for consistent tightness rep after rep. That repeatability is something I preach to my clients constantly. Your setup should be identical every single set. A lever makes that possible.

    First Impressions: Build Quality and Fit Out of the Box

    When the belt arrived, the first thing I noticed was the leather. It was stiff — noticeably stiffer than any belt I’ve owned before. That’s expected with premium 13mm leather, but it’s worth flagging. This belt requires a break-in period, and that’s not marketing copy. It’s real.

    The stitching is immaculate. Even rows, no fraying, no loose threads anywhere. The lever hardware felt solid and heavy. Clicking it into place had a satisfying, mechanical finality to it. You can tell immediately this is not a mass-produced budget product.

    Sizing was straightforward. I measured my waist at the navel and landed squarely in a size large. The fit was snug but not uncomfortable on the first wear. In my experience, SBD’s sizing chart is accurate — trust the measurements, not your intuition about what “large” means.

    The uniform 10cm width around the entire belt was immediately noticeable. No taper in the front. That design choice is intentional and directly impacts how you brace. More on that in the results section.

    Break-In Timeline

    Sessions one through four felt stiff and slightly awkward. By session six, the leather had begun to conform to my torso. Around the two-week mark, it started to feel like a natural extension of my setup. Full comfort arrived somewhere between week three and week four. That timeline matters if you’re planning to use it for a meet or a max effort day soon after purchase.

    How I Tested It: My 3-Month Protocol

    I run a modified conjugate-influenced program four days per week. My testing covered two primary periods: a hypertrophy-focused block and a strength-focused peaking block. That gave me exposure across a wide intensity range.

    Here’s how the belt was used across those 12 weeks:

    • Back squats: 3–5 sets, intensities ranging from 70% to 95% of 1RM, including top sets of 5, 3, and 2 reps
    • Romanian deadlifts: 4 sets of 6–8 reps at moderate load (around 60–70% of deadlift max)
    • Conventional deadlifts: 3–4 sets, intensities from 75% to 92% of 1RM
    • Belt squats (machine): Accessory work, 3 sets of 10–12 reps
    • Good mornings: 3 sets of 8 reps at 40–50% of squat max

    I logged every session. I tracked perceived exertion, lower back fatigue, and whether my brace felt consistent across sets. I also noted any discomfort, rubbing, or hardware issues. Over 12 weeks, that was approximately 36 lower-body sessions with the belt present for at least some portion of each workout.

    What I Was Specifically Measuring

    My primary focus was squat performance. Specifically, I wanted to know whether the belt improved my bracing consistency, reduced post-session lower back fatigue, and allowed me to handle heavier loads more confidently. Secondary focus was on deadlift comfort and lever durability over time.

    What Actually Changed: Honest Results From a Lifting Belt Squat Review

    The single biggest change was bracing feedback. The uniform 10cm width pressing against my core from all sides — front and back — gave me a wall to brace into. That sensation is difficult to explain if you’ve only used tapered belts. It’s like the difference between pressing against a firm surface versus a soft one.

    My top-set squat went from 185kg to 192.5kg over the 12 weeks. That’s not entirely attributable to the belt. Program progression played a role. However, the technical improvement in my brace at 90%+ intensity was real and observable on video. My torso stayed more vertical on heavy attempts. Lower back fatigue on squat day dropped noticeably by week six.

    On deadlifts, the rigidity was even more apparent. At 92% intensity, I felt locked in during the setup in a way I hadn’t experienced with previous belts. The lever made my positioning identical on every single attempt. No more fiddling between sets.

    Post-session soreness in my erectors decreased across the board. That’s meaningful data. It suggests the belt was doing its job — distributing load more effectively and reducing spinal stress during peak effort.

    A Moment of Doubt

    Around week five, I had one session where the lever felt slightly loose after a heavy squat. I stopped mid-set to reset it. That was unsettling. On closer inspection, the lever screw had vibrated slightly loose over time. A small adjustment with a screwdriver fixed it permanently. It hasn’t moved since. That said, it’s worth checking that screw every few weeks as standard maintenance.

    The Downsides You Should Know Before Buying

    No product review is honest without real negatives. Here are the ones that matter.

    The break-in period is real and slightly annoying. If you need a belt for heavy lifting in the next two weeks, buy something else first and come back to this one. You will not enjoy your first few sessions with a stiff 13mm leather belt at high intensity.

    The price is premium. This is not a budget buy. For recreational gym-goers squatting two or three times per week at moderate loads, the cost-to-benefit ratio may not justify it. In my experience, you need to be training consistently at 80% or above for a belt at this price point to make real sense.

    It’s not ideal for high-rep metabolic work. Wearing a rigid 13mm lever belt for sets of 15 squats or conditioning circuits is cumbersome. The lever isn’t as quick to release as a prong, and the stiffness becomes uncomfortable during long-duration sets. For that type of training, a lighter, more flexible belt is the smarter choice.

    Sizing is unforgiving. If you’re between sizes, this belt doesn’t have much adjustment range compared to prong designs. Measure carefully and contact SBD support if you’re genuinely between sizes. Getting this wrong is an expensive mistake.

    Final Verdict: Who Should Buy This Belt — and Who Should Skip It

    After 12 weeks and dozens of sessions, my conclusion is clear. The SBD 13mm Powerlifting & Weight Lifting Belt – British Manufactured Gym Belt for Squats, Deadlifts & Strength Training Lever Weight Lifting Belt is one of the best pieces of training equipment I’ve used in 15 years of coaching. For serious strength athletes, it delivers exactly what it promises.

    This is a complete lifting belt squat review conclusion: if you squat and deadlift heavy regularly — meaning 80% or above, multiple times per week — this belt will improve your performance and your safety. The bracing feedback, lever consistency, and build quality are genuinely elite.

    Buy It If:

    • You compete in powerlifting or plan to
    • You regularly train above 80% of your 1RM on squats or deadlifts
    • You want a belt that will last 10+ years with proper care
    • You value consistent, repeatable setup on every heavy set
    • You’re willing to invest in equipment that genuinely performs

    Skip It If:

    • You’re a recreational lifter training at moderate intensities
    • You primarily do high-rep, circuit-style, or conditioning workouts
    • You need a belt immediately for an upcoming event — the break-in period is not optional
    • Budget is a genuine concern right now

    The Runner-Up: SBD 10mm Belt

    If the 13mm feels like more belt than you need, take a serious look at the SBD 10mm Powerlifting & Weight Lifting Belt – British Manufactured Gym Belt for Squats, Deadlifts & Strength Training Lever Weight Lifting Belt. Same British-made quality and lever design. Slightly more flexible feel straight out of the box. The break-in period is shorter, and it suits lighter weight classes or lifters who prefer a less rigid feel during their training.

    In my view, the 10mm is the right call for intermediate lifters or anyone who wants SBD quality without committing to the full stiffness of a 13mm. It’s also a smart option if you train across a wider rep range and need the belt to feel comfortable during higher-volume work. As a runner-up, it’s an excellent belt in its own right. However, for max-effort strength work, the 13mm remains the top choice.

  • I Used a Theragun Pro for Post-Workout Recovery for 90 Days

    I Used a Theragun Pro for Post-Workout Recovery for 90 Days

    This post contains affiliate links. As an Amazon Associate, I earn from qualifying purchases at no extra cost to you.

    Last spring, I hit a wall. Not a motivational wall — a physical one. I was running my clients through a brutal 12-week strength block, and my own training was stacking up fast. Four days of heavy lifting, two conditioning sessions per week. My legs were constantly trashed. My upper back felt like concrete. I kept telling myself I’d stretch more, sleep better, do all the right things. I didn’t. What I needed was something that actually fit into a real training life — and that search led me straight to this Theragun Pro recovery review.

    I’d been using cheaper percussion guns for years. You know the ones — loud as a lawnmower, two speed settings, dies after six months. They were fine. But fine doesn’t cut it when you’re coaching 40+ sessions a week and still trying to hit serious numbers yourself. I needed something built for daily, heavy use. Something with real depth, real control, and real reliability.

    After 90 days of consistent use, I have a lot to say. Some of it will surprise you. Let’s get into it.

    Why I Chose the Theragun Pro Over Everything Else

    Honestly, I resisted Theragun for a long time. The price point felt hard to justify. Several coaches in my network had them, though, and every single one said the same thing: once you use a real one, you can’t go back. That kind of consistent feedback from people I trust means something.

    I also did my homework. The TheraGun Pro Handheld Deep Tissue Massage Gun – Bluetooth Enabled Percussion Massage Gun & Personal Massager for Pain Relief & Circulation in Neck, Back, Leg, Shoulder and Body (Black – 5th Gen) specifically stood out for a few reasons. The 16mm amplitude is deeper than most competitors. The adjustable arm means you can actually reach your own back without a circus act. The force range — up to 60 lbs of pressure — is the real deal for dense muscle groups like glutes and lats.

    Other options I considered included the Hypervolt and several mid-range guns. The Hypervolt felt smoother but shallower. Mid-range options had quality control issues I kept reading about. For someone who uses recovery tools professionally and personally, I wanted the best percussion device available without gimmicks. The 5th Gen Pro checked every box on paper.

    First Impressions Out of the Box

    The first thing I noticed was the weight. At around 2.2 lbs, it’s substantial but not fatiguing. It feels like a serious tool, not a toy. The build quality is immediately obvious — no rattling, no cheap plastic flex, no loose attachments. Everything snaps in clean.

    The carrying case is a nice touch. It holds all six attachments neatly, plus the charger. I wasn’t expecting to care about the case, but it’s become part of my bag every time I travel to remote coaching locations.

    The adjustable arm took about 30 seconds to understand. You rotate it through four positions, and it locks firmly each time. That feature sounds minor until you’re trying to hit your thoracic spine solo — then it’s everything. The OLED screen is small but clear, showing speed, battery life, and force in real time.

    First use was on my quads after a heavy squat day — 5×5 at 87% 1RM, front-loaded with paused reps. I used the dampener attachment at speed 3 for two minutes per quad. Within about 90 seconds, I felt the difference. Not a miracle, but noticeably more flush than my old gun ever produced.

    How I Tested It Over 90 Days

    My Training Split During the Test Period

    I followed an upper/lower split with a Saturday conditioning day throughout this test. Lower days included heavy squats, Romanian deadlifts (4×8 at 70-75% 1RM), leg press, and lunges. Upper days featured bench press, weighted pull-ups, barbell rows, and overhead pressing. Volume was high — averaging 18-22 sets per session.

    I used the TheraGun Pro Handheld Deep Tissue Massage Gun post-workout every single session. I also used it first thing in the morning on particularly sore days. Total usage averaged about 5-6 sessions per week, usually 10-15 minutes per session.

    I tracked three things: perceived soreness on a 1-10 scale each morning, training readiness (could I hit planned numbers that day?), and sleep quality using my Garmin watch’s sleep score. I wasn’t running a clinical trial, but I was systematic about it.

    Attachments I Used Most

    • Dampener: Daily use on quads, hamstrings, and upper traps. Versatile and forgiving.
    • Thumb attachment: Targeted work on piriformis and thoracic erectors. Excellent for deep tissue spots.
    • Cone: Plantar fascia and forearms. Surprisingly effective for grip fatigue after heavy pulling days.
    • Standard ball: General warm-up use before sessions. Broad surface coverage on lats and glutes.

    Theragun Pro Recovery Review: What Actually Changed

    Here’s the honest part. By week three, my morning soreness scores dropped noticeably. Before using the Pro, my average morning soreness after lower body days was around a 6-7 out of 10. After consistent post-workout and morning use, that average dropped to 3-4. That’s a meaningful difference in training readiness.

    Specifically, my hamstrings — historically my worst recovery spot — felt dramatically better after Romanian deadlift sessions. I used the thumb attachment on the proximal hamstring insertion point for 90 seconds each side at speed 2. The next-day tightness that used to affect my squat depth on back-to-back training days was significantly reduced.

    My sleep scores also ticked upward. Not dramatically — about 4-6 points on average — but consistently. Using the gun on my upper traps and neck for 5 minutes before bed became a genuine wind-down ritual. That mattered more than I expected.

    The Bluetooth App: Useful or Gimmick?

    I’ll be honest — I didn’t think I’d use the app. I was wrong. The Therabody app has guided routines that are actually well-designed. I used the “post-lower body” protocol twice a week for the first month. It walked me through attachment choices, timing, and pressure for each muscle group.

    After month one, I built my own routine and stopped needing the app daily. However, the Bluetooth speed control is still useful. Dialing exact RPM from your phone while the gun is against your back — where you can’t see the screen — is genuinely practical. It’s not marketing fluff.

    The battery life also impressed me. The rated 150 minutes of use is accurate in my experience. I charged it roughly twice per week. That’s it. No mid-session scramble for a cable.

    The Downsides You Should Know

    No product review from me is complete without real talk. Here are my genuine criticisms.

    The price is genuinely high. There’s no spinning that. If you’re a casual gym-goer doing three sessions a week, this investment is hard to justify. A mid-range gun would serve you adequately. The Pro is built for heavy, consistent use — and the price reflects that.

    It’s not silent. The 5th Gen is dramatically quieter than previous versions. That said, it’s still audible in a quiet room. Using it at 5 AM while someone sleeps nearby isn’t ideal. My wife had opinions about this.

    The arm adjustment, while useful, requires both hands to change. Mid-session, that’s mildly annoying. It’s a small complaint but worth mentioning.

    My moment of doubt came around week five. I had a brutal deadlift session — 4×4 at 90% — and my lower back was genuinely wrecked. I used the Pro on my erectors for longer than usual, hoping to speed things up. It didn’t. Lower back recovery still took two full days. Percussion therapy has limits, and acute spinal fatigue is one of them. Manage your expectations accordingly.

    Who This Product Is NOT For

    • Casual exercisers who train 2-3x per week at moderate intensity
    • Anyone expecting it to replace actual programming, sleep, or nutrition
    • Budget-conscious buyers — there are solid options at half the price
    • Anyone with acute injuries — always consult a professional first

    Final Verdict: Is the Theragun Pro Worth It?

    After 90 days, my answer is clear. For high-frequency trainees, coaches, athletes, and anyone serious about recovery, this Theragun Pro recovery review lands firmly on the side of: yes, buy it.

    The TheraGun Pro Handheld Deep Tissue Massage Gun – Bluetooth Enabled Percussion Massage Gun & Personal Massager for Pain Relief & Circulation in Neck, Back, Leg, Shoulder and Body (Black – 5th Gen) is the most well-built, practically designed percussion device I’ve used. The depth, the battery life, the adjustable arm, the quiet motor — all of it adds up to a tool that earns its place in a serious training arsenal.

    Specifically, if you train four or more days per week, handle heavy compound movements regularly, or coach clients daily, this device will pay dividends. In my case, reduced soreness scores, improved training readiness, and better sleep were all measurable outcomes over three months.

    On the other hand, if you train casually or you’re budget-limited, skip it. There are better ways to spend that money in your training setup.

    The Runner-Up: Theragun PRO Plus

    If you want to go one level further, consider the Therabody Theragun PRO Plus – 6-in-1 Deep Tissue Percussion Massage Gun. It adds heated attachments, vibration therapy, and biometric breathwork guidance on top of the standard percussion features. For rehab professionals or athletes managing chronic tension, those extras could be worth the premium. However, for most strength-focused trainers, the standard Pro delivers everything you actually need — without the added complexity.

  • I Tested the Whoop 4.0 Strap for 6 Months: Is the Subscription Worth It

    I Tested the Whoop 4.0 Strap for 6 Months: Is the Subscription Worth It

    This post contains affiliate links. As an Amazon Associate, I earn from qualifying purchases at no extra cost to you.

    Last spring, I had a client named Marcus — a 38-year-old sales executive training for his first powerlifting meet. He was hitting all his numbers in the gym. Squats at 315 lbs for 3×5, deadlifts approaching 405 lbs, bench pressing 225 lbs consistently. On paper, everything looked perfect. Yet he kept stalling. Recovery was the missing piece, and I had no hard data to back that up. That frustration led me straight into this Whoop 4.0 strap review fitness professionals and everyday athletes have been buzzing about for years.

    I decided to strap one on myself for six months before recommending it to a single client. That’s how I operate. I don’t push products I haven’t lived with. What followed was one of the most eye-opening stretches of self-coaching I’ve had in a decade and a half of training.

    Why I Chose the WHOOP Peak – 12 Month Membership

    I looked hard at several wearables. The Apple Watch, Garmin Forerunner 265, and Oura Ring all crossed my desk. Each has merit. However, none of them are built exclusively around recovery and strain the way WHOOP is. That laser focus won me over.

    Three coaches in my network — two strength coaches and one sports performance trainer — had been wearing WHOOP for over a year. Their feedback was consistent: the sleep staging accuracy and the daily recovery score changed how they programmed for themselves and their athletes. That kind of peer recommendation carries serious weight with me.

    I specifically went with the WHOOP Peak – 12 Month Membership – 24/7 Activity and Sleep Tracker, Personalized Coaching, Menstrual Cycle Insights – 14+ Days Battery Life because I wanted the premium tier. The Peak membership includes more advanced features, deeper coaching insights, and longer-range trend analysis. For a 15-year coaching career, I wanted the full picture — not a trimmed-down version of the data.

    First Impressions: Build Quality and Fit

    The packaging is minimal and clean. No gimmicks. The device itself is surprisingly small — far smaller than I expected. It sits flat against the wrist and doesn’t catch on a barbell knurling the way my old Garmin used to.

    The band material feels premium. It’s soft, breathable, and doesn’t irritate my skin during sweaty training sessions or overnight wear. Sizing was straightforward. The fit guide in the app walked me through proper positioning — one to two finger-widths above the wrist bone — for optimal sensor contact.

    There’s no screen. That was jarring at first. No step count staring back at me. No heart rate glancing during a set. Everything lives in the app. Honestly? That ended up being a feature, not a flaw. It removed the temptation to obsess mid-workout and forced me to review data with intention, not anxiety.

    Battery life lived up to the 14-plus-day claim. In six months, I never once ran out of charge mid-day. The battery pack clips directly onto the sensor, so you can charge while wearing it. Genuinely useful during long training days or travel.

    How I Tested the Whoop 4.0 Strap – My Exact Protocol

    I wore the device continuously for 26 weeks. My training during that period followed a conjugate-style powerlifting program, four days per week. Here’s what a typical week looked like:

    • Monday: Max effort lower — working up to a heavy single or triple in the squat or deadlift variation
    • Tuesday: Max effort upper — heavy bench press or close-grip work, 3-5 rep range
    • Thursday: Dynamic effort lower — 8×2 box squats at 60-65% of 1RM, deadlift pulls at 70%
    • Friday: Dynamic effort upper — 8×3 speed bench at 55-60%, accessory pressing work

    Accessory work ran 4-6 exercises per session — Romanian deadlifts, SSB squats, dumbbell rows, face pulls, tricep pushdowns. Volume was significant. I also tracked two 45-minute zone 2 cardio sessions per week on the assault bike.

    Throughout this period, I logged every night’s sleep, tracked my daily strain score, and monitored my heart rate variability trends weekly. Specifically, I paid attention to how my recovery scores correlated with performance in the gym. I kept a training journal alongside the app data for cross-reference.

    What Actually Changed After Six Months

    The results genuinely surprised me — and I’m not easy to impress after this many years.

    Sleep Quality Became Measurable

    Within the first three weeks, I discovered I was averaging only 6 hours and 12 minutes of actual sleep — not time in bed, but restorative sleep. I thought I was getting closer to seven. That gap mattered enormously. As a result, I shifted my bedtime back by 45 minutes and reduced screen exposure after 9 PM.

    By week eight, my sleep performance score was consistently hitting 80-plus percent. My deep sleep and REM percentages both increased. More importantly, my HRV — heart rate variability, a key recovery marker — climbed from a baseline average of 52 ms to 67 ms over three months. That’s a meaningful jump.

    Training Decisions Got Smarter

    On days when my recovery score was in the red — below 33 percent — I stopped forcing max effort sessions. Instead, I dropped intensity to 70-75% and focused on movement quality. That was a hard ego check. However, the gym performance data backed it up. My sessions on green recovery days were consistently better. PRs happened almost exclusively on those days.

    In month four, I hit a 10-pound squat PR — 375 lbs — after a stretch of four consecutive high-recovery days. My training journal confirmed I’d had above-average sleep every night that week. Coincidence? Maybe once. But the pattern held throughout the entire six months.

    The Personalized Coaching Feature

    The WHOOP Peak – 12 Month Membership coaching insights are worth calling out specifically. The app doesn’t just show you data — it tells you what to do with it. After logging consistent late-night eating, it flagged that habit as negatively impacting my sleep consistency. I cut my last meal back by 90 minutes. Within two weeks, my sleep onset time improved noticeably.

    The menstrual cycle tracking feature — while not relevant to me personally — became something I started recommending to female clients immediately. Several women I coach have since adopted the WHOOP Peak – 12 Month Membership – 24/7 Activity and Sleep Tracker, Personalized Coaching, Menstrual Cycle Insights – 14+ Days Battery Life specifically for that capability. Their feedback on training load management during different cycle phases has been outstanding.

    The Downsides You Should Know Before Buying

    I want to be straight with you here. This device is not perfect. There are legitimate limitations worth knowing before you spend the money.

    The Subscription Model Is a Real Cost

    WHOOP operates on a membership model. The hardware is essentially built into the subscription cost. That means you’re paying on an ongoing basis — not a one-time purchase. For some people, that’s a dealbreaker. If you want a wearable you buy once and own outright, this is not that product.

    On the other hand, if you’re serious about performance and recovery data, the membership delivers ongoing value that a static device doesn’t. Weigh that honestly against your budget.

    No GPS and No Screen

    If you run outdoors and want live pace data, WHOOP is not your tool. There’s no built-in GPS. There’s also no display on the device itself. Everything requires the app. For gym-focused athletes, that’s fine. For outdoor endurance athletes who want real-time feedback on the go, it falls short.

    My Moment of Doubt

    Around week ten, I had three consecutive days of low recovery scores despite what felt like solid sleep. My body felt fine. I trained through it and had good sessions. That disconnect frustrated me. In fairness, WHOOP acknowledged this in its own coaching notes — HRV and recovery scores are one input, not the final word.

    Use the data as a guide, not a rulebook. That mental shift made the device far more useful to me. Your subjective feel still matters.

    Who This Is NOT For

    • Casual gym-goers who train 2 days per week and aren’t serious about performance
    • Anyone unwilling to engage with the app and act on the data
    • Athletes who primarily train outdoors and need GPS functionality
    • People who want a one-time hardware purchase with no ongoing cost

    Final Verdict: Is the Whoop 4.0 Strap Worth It for Fitness?

    After six months of daily use — through heavy conjugate training, assault bike cardio, travel, poor sleep weeks, and personal records — my verdict is clear. This device is worth it for the right person.

    This Whoop 4.0 strap review fitness conclusion comes down to one question: are you serious enough about your training to act on data? If yes, the WHOOP Peak – 12 Month Membership – 24/7 Activity and Sleep Tracker, Personalized Coaching, Menstrual Cycle Insights – 14+ Days Battery Life will genuinely change how you train and recover. The HRV tracking, sleep staging accuracy, personalized coaching, and strain insights are best-in-class for what they do.

    I went from guessing at Marcus’s recovery to having a framework I could point to with data. That alone was worth the price of admission. Six months in, I’m still wearing it every single day.

    Buy it if: You train four or more days per week, prioritize performance, want to optimize sleep, or coach athletes who need recovery insights.

    Skip it if: You train casually, don’t want a subscription, or need GPS and a screen for outdoor workouts.

    The Runner-Up: WHOOP Life – 12 Month Membership

    If the Peak tier feels like more than you need, consider the WHOOP Life – 12 Month Membership – 24/7 Activity and Sleep Tracker, Personalized Coaching, Menstrual Cycle Insights – 14+ Day Battery Life as a solid entry point. You still get the core tracking, sleep data, and personalized coaching features. The hardware is identical. However, you’ll access fewer advanced analytics and trend-depth features compared to the Peak tier. For newer athletes or those just getting started with wearable recovery data, it’s a reasonable starting point. That said, serious competitors will want the full capabilities that come with the Peak membership.

  • I Trained With the Rogue Echo Bumper Plates for a Year: Worth the Investment

    I Trained With the Rogue Echo Bumper Plates for a Year: Worth the Investment

    This post contains affiliate links. As an Amazon Associate, I earn from qualifying purchases at no extra cost to you.

    Last spring, a client of mine — a 42-year-old firefighter named Marcus — deadlifted 315 pounds right through my last pair of bumper plates. Not a crack. A full split, right down the collar. I had been running my home gym setup for three years on a budget brand that shall remain nameless. That day ended that relationship permanently. I needed a serious replacement, fast. And honestly, that blowout forced me to do research I probably should have done years earlier — including a deep dive into a Rogue Echo bumper plates review to understand what the gold standard actually looked like.

    Here is what I found: Rogue plates are excellent. They are also expensive. For a full set that covers a working home gym, you are easily spending $600 or more. That is a real number for most people building a training space on a realistic budget. I spent weeks comparing options before landing on something that genuinely surprised me.

    Why I Chose the CAP 160 lb Economy Olympic Bumper Plate Set Over Rogue

    Let me be honest about my decision-making process. I asked around in three separate online strength coaching communities. I cross-referenced Amazon reviews. I also called two gym equipment suppliers I’ve worked with for years. The consensus kept pointing me toward budget bumpers that had improved significantly in the last two years — specifically in collar tolerance and rubber density.

    That research led me to the CAP 160 lb Economy Olympic Bumper Plate Set, 2-Inch Olympic Plates, Medium Bounce Rubber Weight Plates with Steel Hub for Weightlifting, Strength Training & Home Gym Workouts. The price point was the first thing I noticed — dramatically lower than Rogue. However, I wasn’t going to bet my training program on price alone. I needed to put it through real work.

    The set includes a solid spread of plates for general strength training. It covers most loading needs for intermediate lifters, which matched exactly what I needed for both my own programming and coaching clients at my home facility. That said, I went in with tempered expectations.

    First Impressions: Unboxing and Build Quality

    The plates arrived in about four days. Packaging was solid — each plate wrapped individually, no shifting during transit. Right away, I noticed the rubber had a clean, consistent finish. No bubbling. No visible seams splitting near the steel hub. That hub, specifically, was the first thing I inspected closely.

    Budget bumper plates almost always fail at the hub-rubber interface. It is the weakest point. On these, the steel hub felt properly bonded. I tried to torque it manually — no give. Compare that to my previous set, which showed hub separation within eight months of regular use.

    The 2-inch bore fit snugly on my Rogue Ohio bar without any wobble. That matters more than people realize. A sloppy bore creates micro-movements under load, which wears out your bar’s sleeves faster than it should. These fit correctly the first time.

    Weight accuracy was also solid. I spot-checked three plates on a calibrated scale. The heaviest variance I found was 0.4 lbs. For training purposes, that is completely acceptable. Competition plates need tighter tolerances — but for strength development and home gym work, this is fine.

    Rubber Feel and Bounce Behavior

    The plates are labeled “medium bounce,” which is accurate. They do not dead-drop like a premium virgin rubber plate. However, they also do not fly unpredictably off the floor like thin, hard budget rubber. In my testing, drops from overhead — specifically failed snatches at around 115 lbs — produced a controlled single bounce, about 8 to 10 inches off the platform. That is workable.

    For Olympic lifting, this bounce behavior is something to factor in. It is not ideal for high-volume snatch work where the bar needs to settle quickly. For deadlifts, cleans, and press variations, however, it is perfectly functional.

    How I Tested the CAP Bumper Plates Over 12 Months

    I run a modified conjugate-style program four days per week. My sessions include max effort lower, max effort upper, dynamic effort lower, and dynamic effort upper work. These plates were in rotation from day one of the test period.

    Here is a breakdown of what I put them through:

    • Deadlifts: Working up to 455 lbs, 3-5 sets of 1-3 reps, twice weekly
    • Power cleans: 185-225 lbs, 6 sets of 2 reps, once weekly
    • Romanian deadlifts: 225-275 lbs, 4 sets of 6-8 reps, weekly
    • Hang cleans: 155-175 lbs, 5 sets of 3, once weekly
    • Client sessions: 6-8 sessions per week across 4 different athletes, bodyweights ranging from 145 to 245 lbs

    Over 12 months, I estimate these plates absorbed somewhere between 900 and 1,100 training sessions of combined use. That includes drops, slams, and standard touch-and-go work. I tracked hub integrity, rubber condition, and bore tolerances at the 3-month, 6-month, and 12-month marks.

    Client Use and Varied Skill Levels

    One thing worth noting: I coach athletes from beginners to competitive powerlifters. Beginners drop bars awkwardly. They miss lifts at strange angles. They sometimes roll plates across concrete by accident. These plates absorbed all of that without complaint.

    My most aggressive user was a 230 lb former college football player relearning cleans. He dropped from overhead consistently at 135-155 lbs throughout a 16-week block. By week 16, the plates showed surface scuffing but zero structural compromise.

    What Actually Changed in My Training Setup

    The most immediate improvement was simply having a complete, matched set again. After my old plates cracked, I was mixing brands and thicknesses. That creates loading inconsistencies and, honestly, it looks unprofessional when coaching clients. Having a clean, matched set from the CAP 160 lb Economy Olympic Bumper Plate Set cleaned up my setup immediately.

    Beyond aesthetics, the hub durability genuinely surprised me. At the 6-month check, I found zero separation or cracking at the steel hub interface. My previous budget plates showed early separation at month four. That difference matters for long-term value.

    Noise levels also improved. Older rubber hardens over time and becomes louder on impact. These plates stayed consistent throughout the test period — important for a home gym where I’m coaching at 6:00 AM three days a week.

    Performance at Heavy Loads

    At loads above 400 lbs, the plates performed without issue. The bore maintained its fit on the bar sleeve throughout the test. I experienced no slipping during heavy deadlift sets, even during touch-and-go work at 365-385 lbs. For context, that kind of repetitive impact is where cheaper plates tend to loosen up over time.

    In my experience, most budget bumper plates start showing bore looseness around the 6-month mark under heavy use. These did not. That alone earns them a significant credibility point.

    The Downsides You Should Know Before Buying

    I want to be straight with you here. These plates are not Rogue Echo plates. Anyone doing a serious Rogue Echo bumper plates review comparison will tell you the same thing. The rubber on premium plates feels noticeably denser. Dead-drop behavior is more controlled. And the finish is simply more refined.

    For competitive Olympic weightlifters training multiple sessions daily, I would not recommend these as a primary set. The medium bounce characteristic becomes a real issue at high training volumes. Consistent bouncing during high-rep snatch or clean complexes gets fatiguing and inefficient.

    There was one moment — around month eight — where I genuinely questioned my choice. I was running a peaking block with heavy deadlifts at 94% of my max, five singles with short rest periods. The plates held up structurally, but the slightly higher bounce made resetting between singles slightly more annoying than it needed to be. It was not a dealbreaker. However, it reminded me that this is a mid-tier product, not a premium one.

    Who These Plates Are NOT For

    • Competitive Olympic lifters needing dead-drop performance
    • Commercial gym owners expecting 10+ years of daily institutional use
    • Athletes training 2-3 sessions per day, every day
    • Anyone who prioritizes aesthetics and precision finish above function

    On the other hand, if you fall outside those categories, the limitations are largely minor trade-offs rather than real problems.

    Final Verdict: Is This the Right Set for You?

    After 12 months of real, high-volume training, here is my honest take. The CAP 160 lb Economy Olympic Bumper Plate Set, 2-Inch Olympic Plates, Medium Bounce Rubber Weight Plates with Steel Hub for Weightlifting, Strength Training & Home Gym Workouts is a genuinely capable set for the price. It survived a year of abuse — client sessions, heavy pulls, power cleans, and repeated drops — without structural failure. That earns real respect from me.

    Does it replace premium plates like Rogue? No. Anyone running a thorough Rogue Echo bumper plates review side-by-side comparison will see clear differences in rubber density and drop behavior. However, the question you actually need to answer is this: do those differences justify paying two to three times more for your home gym setup?

    For most people — no. Specifically, for intermediate to advanced lifters training 3-5 days per week in a home gym setting, these plates deliver excellent durability, acceptable bounce control, solid hub integrity, and a complete loading spread. At the price point, the value is hard to beat.

    Buy These If You Are:

    • Building or upgrading a home gym on a realistic budget
    • Training strength-focused programs (powerlifting, CrossFit, general strength)
    • Coaching a small group of athletes in a private facility
    • An intermediate lifter working in the 135-315 lb loading range regularly
    • Someone who needs a matched, reliable set without a premium price tag

    Skip These If You Are:

    • Competing in Olympic weightlifting or need dead-drop precision
    • Running a high-traffic commercial facility
    • Training twice daily with high-volume snatch and clean work

    The Alternative Worth Considering

    If the 160 lb set feels limiting for where your programming is headed, there is a direct step-up worth knowing about. The CAP 190 lb Economy Speckled Olympic Bumper Plate Set, 2-Inch Olympic Plates, Medium Bounce Rubber Weight Plates with Steel Hub for Weightlifting, Strength Training & Home Gym Workouts gives you an additional 30 lbs of loading capacity.

  • What 15 Years of Training People Has Taught Me About Motivation

    What 15 Years of Training People Has Taught Me About Motivation

    This post contains affiliate links. As an Amazon Associate I earn from qualifying purchases.

    In my first year as a trainer, I was convinced that motivation was something you either had or you didn’t. I’d watch a client crush three weeks of early morning sessions, then vanish — and I’d quietly blame them. By year five, I stopped blaming clients. By year fifteen, I barely talk about motivation at all. Not because it doesn’t matter, but because I’ve learned that what most people call motivation is actually something else entirely — and chasing it directly is one of the fastest ways to fall off any fitness program.

    I’ve trained somewhere north of 400 clients over my career. Beginners who had never touched a weight. Endurance athletes trying to add strength. People recovering from surgery. Desk workers with chronic back pain. Post-partum mothers. Retired veterans. And if there’s one thing that cuts across every demographic, every goal, and every fitness level, it’s this: the people who succeed long-term are almost never the most motivated people in the room on day one. They’re the ones who built the right systems, reframed what exercise actually means to them, and stopped waiting to feel ready.

    Here’s what fifteen years of real-world experience has actually taught me about exercise motivation long term.

    Motivation Is a Feeling, Not a Strategy

    This is the first thing I tell every new client during their intake session. Motivation is an emotional state — it fluctuates with your sleep quality, your stress levels, your hormones, your work deadlines, and about fifty other variables you can’t control. Treating it like a stable resource you can tap into on demand is setting yourself up for failure.

    Research backs this up. A 2016 study published in Health Psychology Review found that intentions and motivation are poor predictors of actual exercise behavior over time. What predicts behavior? Habit formation and environmental design — two things that have nothing to do with how pumped you feel on a Monday morning.

    When a client tells me “I just can’t stay motivated,” I hear: “I haven’t built a system that works when motivation is low.” That’s a solvable problem. Waiting to feel motivated is not.

    The Identity Shift No One Talks About

    Around year seven of my career, I started paying close attention to the clients who made permanent changes versus the ones stuck in the start-stop cycle. The difference wasn’t their workout program. It wasn’t their nutrition plan. It was how they talked about themselves.

    Long-term exercisers say things like “I’m someone who moves every day” or “I don’t feel right if I miss a workout.” Short-term motivators say “I’m trying to get back into shape” or “I’m being good right now.” One framing is about identity. The other is about a temporary effort with an implied expiration date.

    James Clear popularized this concept in Atomic Habits, but I watched it play out in real sessions long before that book came out. When you start making decisions based on who you want to be rather than what you want to achieve, the motivation question becomes almost irrelevant. You don’t need to feel motivated to do something that’s just part of who you are.

    My practical application: I ask clients to write down three “I am” statements about their fitness identity on week one. We revisit them every six weeks. The shift in language over a twelve-week block is often striking.

    Why Small Wins Beat Big Goals Every Time

    I’ve watched more people fail because of ambitious goal-setting than because of laziness. The 75 Hard program, extreme calorie deficits, six-days-a-week training blocks for someone who hasn’t exercised in three years — these things look impressive on paper and collapse spectacularly in practice.

    The neurological reality is that small, consistent wins build dopamine-driven reward loops that reinforce behavior. Every time you complete a workout — even a ten-minute one — your brain tags that experience as positive and subtly increases the likelihood you’ll repeat it. Stack those wins for weeks, and you’ve built something far more durable than motivation: you’ve built a neural pathway.

    This is why I’m a genuine advocate for the “minimum viable workout” approach with clients who are rebuilding after a long break. Two sets instead of four. Three days instead of five. Done is infinitely better than perfect-but-abandoned.

    Environmental Design: The Underrated Variable

    If you have to overcome friction every single time you want to work out, you’ll eventually stop. This is not a character flaw. It’s basic behavioral science.

    I’ve helped clients make changes as simple as sleeping in their gym clothes when they have 5 AM sessions, keeping their workout bag by the front door, or setting up a corner of their living room as a dedicated movement space with a mat and a few kettlebells. These tiny friction-reducing moves have kept people consistent through periods of low motivation that would have derailed them otherwise.

    Stanford behavioral scientist BJ Fogg calls this “motivation wave” dependency a trap, and I agree completely. Design your environment for your worst day, not your best day. When you’re exhausted and stressed and really don’t feel like doing anything, the setup should make it easier to start than to skip.

    Tracking: What It Does (and What It Doesn’t)

    I’m a strong believer in tracking — with one important caveat. Tracking works when it generates data you actually act on. It fails when it becomes performative, anxiety-inducing, or so detailed that it takes more energy than the workout itself.

    I recommend simple, consistent logging: the exercise, the sets, the reps or duration, and a brief note on how you felt. That’s it. Over twelve to sixteen weeks, that log becomes one of the most powerful motivation tools you have — not because of the numbers, but because of the visible evidence of your own consistency. Seeing six weeks of check marks does something to your brain that a goal on a whiteboard simply cannot.

    Honest caveat here: tracking doesn’t work equally well for everyone. I’ve had clients with perfectionist tendencies or disordered relationships with fitness metrics for whom detailed journaling made things worse, not better. Know yourself. If tracking makes you feel controlled rather than empowered, a lighter approach or none at all may serve you better.

    What I Recommend (and Use)

    Over the years, I’ve pointed clients toward a handful of tools that genuinely support long-term exercise motivation — not hype, just things that have shown up consistently in real results.

    • Mini Habits for Fitness: The 60-Day Plan to Rebuild Your Relationship with Exercise — I’ve recommended this to at least thirty clients who were stuck in the all-or-nothing cycle. The approach is grounded in the neuroscience of habit formation and it’s the most practical book I’ve found for people who keep “starting over.” The 60-day structure is just long enough to actually see results.
    • 75 Day Hard Challenge Journal for Men or Women with PVC Cover — If you’re doing a structured challenge and want a physical tracking system, this one is well-designed. The daily, weekly, and monthly layout mirrors the accountability framework I use with my own clients, and the durable PVC cover means it’ll survive a gym bag without falling apart.
    • Fitness Workout Journal for Women & Men (A5 Workout Log Book Planner) — For straightforward session logging, this is the format I’d recommend. It’s compact enough to keep in a gym bag, structured without being overwhelming, and the A5 size is exactly right for daily use without feeling like homework.

    The Long Game Is the Only Game

    After fifteen years of standing next to people while they work, struggle, quit, restart, and occasionally transform — I can tell you with complete confidence that the goal is never really about the goal. A client who loses 30 pounds and keeps it off for a decade didn’t do it because they were more motivated than the person who lost it and gained it back. They did it because, somewhere along the way, exercise stopped being something they did and started being something they were.

    That shift doesn’t happen because of a great playlist or a motivational quote. It happens because of consistent reps — not just in the gym, but in showing up when you don’t feel like it, adjusting when life gets in the way, and building a relationship with movement that isn’t conditional on feeling inspired.

    Stop chasing motivation. Build the system. Show up anyway. That’s the whole thing.

  • The Recovery Protocol I Give Every Client Over 40 (Based on Physiology, Not Opinion)

    The Recovery Protocol I Give Every Client Over 40 (Based on Physiology, Not Opinion)

    This post contains affiliate links. As an Amazon Associate I earn from qualifying purchases.

    I had a 44-year-old client — former college wrestler, still training four days a week — come to me frustrated and confused. He wasn’t slacking. His nutrition was solid. His programming was intelligent. But he was constantly sore, his lifts had stalled, and he told me he felt “beat up all the time.” Sound familiar?

    The problem wasn’t his training. It was that he was recovering like a 24-year-old, and his body was done pretending that worked.

    After 15 years of training clients and holding a B.S. in Kinesiology, I can tell you with confidence: the biggest mistake I see active adults over 40 make is treating recovery as an afterthought. The training is the easy part. Recovery is where the adaptation actually happens — and the physiology shifts meaningfully once you’re past 40 in ways that demand a structured response, not just “rest days.”

    Here is the exact recovery protocol I build for every client over 40. It’s grounded in exercise science, refined by real-world results, and honest about where the evidence is still evolving.

    Why Recovery Changes After 40 (The Physiology Behind It)

    This isn’t about being “older” in some vague, discouraging way. There are specific, measurable physiological changes happening that directly affect how fast you bounce back from training.

    • Testosterone and growth hormone decline. Both are critical for muscle protein synthesis and tissue repair. Research published in the Journal of Clinical Endocrinology & Metabolism confirms that testosterone levels in men drop roughly 1-2% per year after 30. Women experience significant hormonal shifts around perimenopause that also impact recovery capacity.
    • Reduced satellite cell activity. Satellite cells are the muscle stem cells responsible for repairing micro-tears after training. Their activation and proliferation slows with age, meaning the same workout takes longer to recover from.
    • Increased systemic inflammation. Chronic, low-grade inflammation — sometimes called “inflammaging” — becomes more pronounced with age and stacks on top of the acute inflammation from exercise. You’re not starting from zero between sessions anymore.
    • Decreased sleep quality. Slow-wave sleep, the stage where the majority of growth hormone is released and tissue repair occurs, decreases significantly after 40. This is not optional downtime. It is when your body physically rebuilds.

    Understanding this isn’t meant to depress you. It’s meant to explain exactly why a targeted protocol is necessary — not optional.

    The 5-Part Recovery Protocol

    1. Sleep Architecture, Not Just Sleep Hours

    I tell every client over 40 the same thing: seven hours of fragmented, shallow sleep is not the same as six and a half hours of quality sleep. The goal is sleep quality, specifically protecting slow-wave and REM stages.

    Practically, this means:

    • Consistent sleep and wake times, even on weekends (circadian rhythm consistency matters more than most people realize)
    • Room temperature between 65-68°F — core body temperature must drop to initiate deep sleep
    • No screens within 60 minutes of bed — blue light suppresses melatonin, which is not just a sleep hormone but also has antioxidant properties relevant to recovery
    • Magnesium supplementation before bed (more on this below)

    2. Protein Timing and Distribution

    The research on muscle protein synthesis in older adults is clear: you need more protein per meal, not just more total protein. A 2016 study in The American Journal of Clinical Nutrition found that older adults required approximately 0.4g of protein per kilogram of body weight per meal to maximally stimulate muscle protein synthesis — roughly double what younger adults needed per sitting.

    For a 180-pound client, that’s about 33 grams of protein per meal, distributed across three to four meals. Front-loading a smoothie and calling it done doesn’t work for this population.

    3. Structured Soft Tissue Work

    I’m not talking about rolling a lacrosse ball around aimlessly. I mean consistent, targeted soft tissue work with intent. For clients over 40, I prescribe 10-15 minutes of percussion therapy or foam rolling within two hours post-training, focused on the primary movers from that session.

    Percussion massage devices have become a legitimate recovery tool, not just a gadget. The mechanical stimulus increases local blood flow, reduces delayed onset muscle soreness (DOMS), and appears to reduce sympathetic nervous system tone — meaning it helps you shift out of the stress state the workout created. I use a percussion massager with my clients regularly in-session, particularly for hip flexors, thoracic extensors, and the posterior chain.

    4. Active Recovery Days Done Correctly

    Rest days are not the same as active recovery days, and both have a place. Active recovery — 20 to 30 minutes of low-intensity movement at 50-60% of max heart rate — accelerates metabolic waste clearance from muscle tissue, reduces perceived soreness, and keeps movement patterns grooved without adding meaningful load to the system.

    Walking is underrated. Zone 2 cycling is excellent. What it should not look like: an extra conditioning session because you “felt good.”

    5. Parasympathetic Downregulation After Training

    Most clients over 40 who are struggling with recovery are chronically sympathetically dominant — their nervous system is stuck in a stress response. Training adds to that load. If you go directly from a hard workout to your work inbox or a stressful commute, you are interrupting the recovery cascade.

    I have clients spend 5-10 minutes post-training doing box breathing (4 counts in, 4 hold, 4 out, 4 hold) or simply lying in a quiet space. This is not soft. Research supports the role of heart rate variability (HRV) and vagal tone in recovery, and intentional parasympathetic activation after training has measurable effects on next-session readiness.

    What I Use and Recommend

    I’m careful about supplement recommendations because most of them don’t matter. Magnesium is the exception for this population, and I’ve seen consistent results with clients using it over a combined 200+ client-years of observation.

    Specifically, magnesium glycinate — not oxide, not citrate in isolation — has the best absorption profile and the most consistent effect on sleep quality and muscle relaxation. For clients who prefer a two-pack supply (which I recommend because compliance drops when you run out), the Habit Magnesium Sleep & Recover Supplement Dual Pack, Magnesium Glycinate, Vitamin B6, Lemon Balm (120 Capsules, 1 Pack x 60 Capsules) is what I point people toward. The inclusion of vitamin B6 and lemon balm addresses both the absorption pathway and the nervous system calming effect. For those who want to start with a single bottle first, the Habit Magnesium Sleep & Recover Supplement, Magnesium Glycinate, Vitamin B6, Lemon Balm, 60 Capsules is the same formulation in a single-pack format.

    For soft tissue work, I recommend the TOLOCO Massage Gun, Deep Tissue Back Massage for Athletes for Pain Relief, Percussion Massager with 10 Massage Heads & Silent Brushless Motor. The silent brushless motor matters more than people expect — clients actually use tools that don’t sound like a jackhammer. Ten interchangeable heads means you can adapt for different tissue types and depths, and the percussive frequency is effective for post-training recovery work.

    An Honest Caveat

    I want to be direct about something: this protocol produces results, but it takes longer to show up than most people want. We live in a culture that wants 30-day transformations. For clients over 40 implementing real recovery changes, the meaningful shift in how they feel and perform typically shows up at the 6-to-8-week mark. Not because the protocol is slow — because physiology is slow, and anyone telling you otherwise is selling something.

    I also want to acknowledge that some fatigue and recovery issues in this age group have hormonal or medical roots that no recovery protocol can fully address. If you’re doing everything right and still feel consistently depleted, a panel with your physician — including thyroid, testosterone, and cortisol — is worth having. Training and lifestyle are powerful, but they’re not the whole picture.

    The Bottom Line

    Workout recovery over 40 requires a deliberate system, not wishful thinking. Sleep quality, protein distribution, soft tissue work, active recovery, and nervous system downregulation are not luxury additions to your program. They are the program, as much as the sets and reps are.

    The clients I’ve trained who age the best — who are still moving well, still making progress at 52 or 58 or 63 — are not the ones who trained the hardest. They’re the ones who recovered the smartest. That’s the variable you can actually control, and it’s the one most people completely neglect.

    Start with sleep and magnesium this week. Add the soft tissue work the week after. Build the system piece by piece. Your training will catch up.

  • Why I Changed My Advice on Stretching After Reading the Latest Research

    Why I Changed My Advice on Stretching After Reading the Latest Research

    This post contains affiliate links. As an Amazon Associate I earn from qualifying purchases.

    For the first eight years of my career, I told every single client the same thing: stretch before you work out to prevent injury, stretch after to cool down. I said it with confidence. I printed it on intake forms. I watched people dutifully touch their toes for 30 seconds before a squat session and felt like I was doing my job.

    Then I actually read the research. Not the summaries. Not the fitness magazine recaps. The actual peer-reviewed studies on stretching before or after workout science — and I had to sit with some uncomfortable realizations about advice I had been dispensing for nearly a decade.

    Here is what the science actually says, what I changed in my practice, and what I still do not have a clean answer to even after 15 years of working with real bodies.

    The Myth That Started It All: Static Stretching Before Exercise

    The traditional warm-up protocol — hold each stretch for 30 to 60 seconds before training — is not just ineffective as a pre-workout strategy. In many cases, it is actively counterproductive. This is not a fringe opinion. The evidence has been building since at least 2004, when a landmark review in the Scandinavian Journal of Medicine and Science in Sports found that acute static stretching can reduce muscle strength by up to 8 percent and power output by up to 5 percent.

    More recent meta-analyses have reinforced this. A 2013 review published in the Journal of Strength and Conditioning Research — looking at over 100 studies — concluded that pre-exercise static stretching consistently impairs force production, particularly when stretches are held for longer than 60 seconds. The mechanism is partly neurological: prolonged static stretching appears to reduce the excitability of the motor neurons you are about to ask to fire hard during your workout.

    I had a competitive powerlifter named Marcus who came to me in 2017 wondering why his deadlift numbers had stalled. His old coach had him doing 10 minutes of static hip flexor and hamstring stretching before every pull session. We cut it. Within three weeks, he added 15 pounds to his pull. Was that entirely the stretching change? No. But the timing was not a coincidence either.

    What You Should Actually Do Before a Workout

    Dynamic warm-up. Full stop. This is where the science and my on-the-floor experience are in complete agreement, which does not always happen.

    Dynamic movements — leg swings, hip circles, inchworms, walking lunges, arm crossovers — increase core temperature, improve synovial fluid distribution in joints, and activate the neuromuscular patterns you are about to train. They improve range of motion acutely without the performance-suppressing effects of prolonged static holds.

    My standard protocol for most clients now looks like this:

    • 3 to 5 minutes of light cardio (bike, treadmill, or jumping jacks)
    • 8 to 10 reps of leg swings in two planes
    • Hip 90/90 rotations — 5 per side
    • Thoracic spine rotations in quadruped — 8 per side
    • Bodyweight squats or the movement pattern they are training that day — 10 reps at controlled tempo

    That is it. Ten to twelve minutes. It works consistently better than any static stretching protocol I used in my first decade of training people.

    So When Does Static Stretching Actually Help?

    Post-workout. And here is where the science becomes more nuanced — and honestly, more interesting.

    The evidence for static stretching improving long-term flexibility when done after training is reasonably solid. Muscle temperature is elevated, tissue compliance is higher, and you are not about to ask those muscles to generate force. A 2011 study in the Journal of Human Kinetics showed meaningful gains in hamstring flexibility after eight weeks of post-exercise static stretching performed at elevated muscle temperatures.

    For clients with movement restrictions — and in my corrective exercise work, that is most people — targeted post-workout stretching is where I invest time. Hip flexors after lower body days. Pec minor and thoracic extension after heavy pressing. Calves after any run-heavy session.

    Hold times matter here too. For genuine lengthening adaptations, research suggests holds of 30 to 90 seconds repeated two to four times produce better outcomes than the quick 10-second stretches most people do. If you are not holding long enough to feel mild discomfort — not pain, mild discomfort — you are probably not creating enough mechanical load to stimulate change.

    The Role of Soft Tissue Work: Where Foam Rolling Fits In

    Foam rolling — technically self-myofascial release — occupies its own interesting niche in the stretching conversation. The research on foam rolling before exercise is actually more favorable than static stretching. A 2015 review in the International Journal of Sports Physical Therapy found that pre-exercise foam rolling can improve acute range of motion without the strength deficits associated with static stretching.

    My current recommendation: foam roll before, static stretch after.

    I spend two to three minutes on the thoracic spine and hip flexors before lower body sessions using a firm-density roller. The tactile feedback and the parasympathetic response seem to help clients feel more mobile without leaving anything on the table strength-wise.

    The Honest Caveat I Have to Include

    Here is where I have to be straight with you: individual variation is real and the research does not always translate cleanly to every body.

    I have clients — particularly older adults and people with chronic tightness — who genuinely feel and perform better with some gentle static work before exercise. A 68-year-old woman I train three times a week for the last four years does 5 minutes of gentle static stretching before every session. Her movement quality is better for it and her injury rate is zero. Does that contradict the research? Technically, yes — but she is not a competitive athlete, her goal is pain-free function, and her subjective experience matters.

    Science gives us probabilities, not guarantees. My job as a trainer is to understand the research and then apply it intelligently to the individual in front of me. Anyone who tells you the research is the final word on how your specific body responds has not trained enough people.

    What I Use and Recommend

    Over 15 years I have gone through a lot of equipment. These are the tools I actually use with clients and keep in my own gym bag for soft tissue work and post-workout flexibility training.

    For straightforward foam rolling, the ProsourceFit High Density Foam Roller is a reliable, no-nonsense option. The 12-inch length works well for thoracic spine mobilization and IT band work without being bulky. It holds up under consistent daily use, which cheaper rollers simply do not.

    If you want a more complete toolkit, the Foam Roller Set with Muscle Roller Stick, Fasciitis Balls, and Stretching Strap gives you multiple tools for whole-body soft tissue work and targeted mobility. The combination of roller, stick, and lacrosse-style balls covers surface area that a single foam roller cannot reach — particularly the plantar fascia, calves, and upper traps.

    For post-workout assisted stretching — especially hamstrings, hip flexors, and the thoracic spine — a good strap makes a real difference in getting adequate leverage without a partner. The Acozycoo Stretching Strap with Loops has multiple loop positions that let you progressively move into end-range without losing control of the stretch. Much more useful than a resistance band or a towel, which is what most people improvise with.

    The Bottom Line

    The stretching before or after workout science is clear enough on the core points: static stretching immediately before training impairs performance and does not reliably prevent injury. Dynamic warm-up before, targeted static stretching after, and foam rolling used intelligently at either end of your session — that is the protocol supported by both the evidence and 15 years of watching what actually works with real people.

    Change is uncomfortable, especially when you have been confidently giving the opposite advice for years. But the whole point of staying current in this field is being willing to update what you teach when better information becomes available. That is the job.

  • After 15 Years Coaching: The Single Fitness Mistake I See Most Often

    After 15 Years Coaching: The Single Fitness Mistake I See Most Often

    This post contains affiliate links. As an Amazon Associate I earn from qualifying purchases.

    I remember the exact moment I realized I’d been watching the same mistake play out, over and over, for over a decade. A new client — late 30s, motivated, had just bought new shoes, a gym bag, and a six-month membership — sat across from me during our intake session and handed me a printed 6-day-per-week training plan he’d found online. He was proud of it. I had to gently explain that this plan, with its daily heavy lifting and zero programmed rest, was almost certainly going to derail him within three weeks. It did for the previous version of him I’d trained six times before. Different people. Same mistake.

    After 15 years coaching clients across all fitness levels, I’ve identified dozens of common fitness mistakes beginners and even intermediate athletes make. But when I look back across hundreds of clients and thousands of training sessions, one mistake towers above the rest in terms of how often it happens and how much damage it quietly does.

    It’s not poor form. It’s not skipping leg day. It’s not even bad nutrition — though that’s close.

    The single most common fitness mistake I see is training without a written, progressive plan and then wondering why progress has stalled.

    Why This Mistake Is So Invisible

    The reason this particular error is so pervasive among the most common fitness mistakes beginners make is that it doesn’t feel like a mistake when you’re doing it. You show up to the gym. You work hard. You sweat. You’re sore the next day. Everything feels productive.

    But feeling productive and being productive are dangerously different things in exercise science.

    The foundational principle underpinning almost every training adaptation — strength gains, hypertrophy, cardiovascular improvement, fat loss — is called progressive overload. Simply put, your body adapts to stress. Once it adapts, the same stress produces no further adaptation. You have to progressively increase the demand over time: more weight, more reps, shorter rest, more volume, greater complexity of movement.

    Here’s the problem: without a written log, you cannot track progressive overload. You think you remember that you squatted 135 lbs for three sets of eight last Tuesday, but did you? Was it eight reps or six on that last set? Did you rest 90 seconds or closer to three minutes? The human memory is not a reliable training tool, and I say that as someone who spent years believing mine was the exception.

    What the Research Actually Says

    This isn’t just anecdotal. A 2017 review published in the Journal of Strength and Conditioning Research on resistance training variables confirmed that systematically manipulating training load and volume over time produces significantly greater strength and hypertrophy outcomes than unstructured training, even when total volume is equated. The structure itself matters.

    The NASM Optimum Performance Training (OPT) model, which forms the backbone of my programming philosophy, is built around periodization — planned phases of stabilization, strength endurance, hypertrophy, and maximal strength. You literally cannot apply periodization without knowing where you’ve been. A log is not optional in this framework. It’s the foundation.

    Beyond periodization, logging also reduces injury risk. I’ve used the Functional Movement Screen (FMS) with clients for over eight years, and one of its core insights is that asymmetries and compensations compound over time when left unaddressed. If you’re not writing down when your left hip starts feeling tight, or when a particular movement pattern starts breaking down under load, you miss the early warning signs. I’ve seen that oversight turn minor dysfunctions into full rotator cuff tears and chronic low back issues.

    What I Actually See in the Gym

    Let me give you the real picture, not the polished version.

    Roughly 70 to 80 percent of new clients I take on have no written record of their training history. Of those, nearly all describe their progress in vague terms: “I’ve been stuck for a while,” or “I feel like I’m working hard but not seeing results.” When I dig in and ask them what they lifted six weeks ago on their primary compound movements, they can’t tell me. When I ask how many sets and reps they did last Thursday, the answer is usually a guess.

    Compare that to the clients who come in with logs — even imperfect ones. They might have been training incorrectly, but at least we have data. We can identify the problem, apply a solution, and measure whether it works. That’s actual coaching. Without the log, I’m shooting in the dark along with them.

    The Honest Caveat I Have to Include

    Here’s where I want to be straight with you, because I think fitness content too often oversimplifies: logging alone does not fix a bad program.

    I’ve seen clients who logged religiously but followed programming so imbalanced — all push, no pull, no posterior chain work — that they logged their way into impingement syndrome. The log is a tool. It is not a substitute for sound programming principles. If you’re a beginner and you don’t yet understand concepts like periodization, muscle balance, or volume landmarks, pairing your log with a credible resource on exercise science is important.

    Additionally, some people do experience what exercise scientists call “training anxiety” around rigid logging. For a small percentage of clients — particularly those with perfectionist tendencies or a history of disordered relationships with exercise — obsessive tracking can become counterproductive. Know yourself. The goal of a log is clarity and progress, not another source of pressure.

    How to Start Logging Correctly

    I recommend keeping your log simple enough to actually use. For each training session, record the following:

    • Date and time of session
    • Exercises performed (specific names, not just “chest day”)
    • Sets, reps, and load for each movement
    • Rest intervals (at least approximately)
    • Subjective notes: energy level, anything that felt off, any pain or tightness

    Review your log before every session. Your goal for most sessions should be to beat at least one variable from the previous week — even if it’s one extra rep on one set. That’s progressive overload in practice. It compounds dramatically over months and years.

    Recommended Tools I Use With Clients

    I’m old-school in at least one way: I still believe a physical journal beats an app for most people, especially beginners. There’s something about writing it down by hand that reinforces commitment and retention. Here’s what I currently recommend:

    For most beginners, the Fitness Workout Journal for Women & Men (A5 Green) is an excellent starting point. It’s well-organized, the A5 size fits in a gym bag without bulk, and the layout guides you through exactly the kind of structured logging I described above. I’ve handed this to clients who swore they’d never keep a journal, and most of them are still logging six months later.

    For clients who want something with a sturdier build — especially those training five or more days a week and putting real mileage on their logs — I recommend the Nextnoid Hardcover Fitness Journal Workout Planner. The hardcover construction holds up in a gym environment, and the A5 format keeps it portable. I’ve seen cheaper journals fall apart within a month of daily use. This one doesn’t.

    On the education side, if you want to understand why you’re doing what you’re doing — which I believe every serious trainee should — Strength Training Anatomy by Frédéric Delavier is the single book I recommend more than any other. I’ve owned multiple copies over the years. It gives you a clear visual understanding of which muscles each exercise targets and how movement mechanics affect muscle recruitment. It turns logging from data collection into informed, intentional training.

    The Bottom Line

    After 15 years of watching people work incredibly hard with mediocre results, I can tell you that the gap between those who make consistent progress and those who plateau isn’t usually talent, genetics, or even time in the gym. It’s almost always the presence or absence of a structured, written, progressive plan.

    Among all the most common fitness mistakes beginners make, this one is both the most fixable and the most overlooked. It costs nothing but a journal and the discipline to open it before and after every session.

    Start logging next workout. Not next Monday. Next workout. The compounding effect of documented, intentional progress over 12 months will surprise you more than any program you could download tonight ever will.

  • The Core Exercise I Programme for Almost Every Client (It Is Not a Crunch)

    The Core Exercise I Programme for Almost Every Client (It Is Not a Crunch)

    This post contains affiliate links. As an Amazon Associate I earn from qualifying purchases.

    About three years into my career, I had a client — mid-40s, desk job, chronic low back pain — who told me her previous trainer had her doing 200 crunches a day. Two hundred. Her back hurt worse than when she started, her hip flexors were chronically tight, and her actual core strength, when I tested it, was almost nonexistent. That moment crystallised something I had been slowly learning from the exercise science: the crunch is not the best core exercise. Not even close. And for a huge portion of the population, it is actively making things worse.

    After 15 years of programming for clients ranging from 18-year-old athletes to 72-year-old post-rehab patients, there is one core exercise I come back to more than any other. It shows up in beginner programmes, in advanced athlete blocks, in corrective exercise plans, and in maintenance routines for people who just want to feel good moving through life. That exercise is the dead bug.

    Why the Dead Bug Is the Best Core Exercise for All Fitness Levels

    The dead bug is not flashy. It does not look impressive on Instagram. But from an exercise science standpoint, it checks every box that matters for real-world core function.

    The core’s primary job is not to flex the spine — it is to resist unwanted movement of the spine while the limbs do work. This concept, known as anti-extension and anti-rotation stability, is backed extensively in the research of Dr. Stuart McGill, whose work on spine biomechanics out of the University of Waterloo has influenced how serious trainers and physical therapists approach core training for over two decades. The dead bug trains exactly this quality. You are lying on your back, maintaining a neutral spine and a stable pelvis, while opposing limbs extend away from the body. Your core has to fight to keep everything still. That is the real job of the core.

    Contrast that with a crunch, which repeatedly loads the spine into flexion under tension — a movement pattern McGill’s research directly links to disc stress over time, particularly in people who already spend eight hours a day flexed forward at a desk.

    How to Actually Do the Dead Bug Correctly

    I cannot tell you how many times I have watched someone “do dead bugs” with their lower back arched off the floor, their breath held, and their limbs moving so fast the exercise becomes pure momentum. Here is what correct execution actually looks like:

    • Lie on your back with arms extended straight toward the ceiling. Knees bent at 90 degrees, shins parallel to the floor — this is your tabletop position.
    • Press your lower back firmly into the floor. There should be no daylight between your lumbar spine and the surface. This is your “neutral brace” position and it is non-negotiable.
    • Inhale to prepare, then exhale fully and brace your core as if you are about to take a punch. Not sucking in — bracing outward in all directions.
    • Slowly extend the opposite arm and leg toward the floor, hovering just above it, while keeping the lower back glued down. Move only as far as you can without losing that lumbar contact.
    • Return to start and repeat on the other side. I typically programme 3 sets of 5 to 8 controlled reps per side, with a 3-second descent on each rep.

    Slow is the word. I tell clients: if you can do it quickly, you are doing it wrong. The tempo is where the training stimulus lives.

    How I Progress the Dead Bug Across Fitness Levels

    This is where the dead bug separates itself from most core exercises in terms of versatility. Here is how I actually scale it across a wide range of clients:

    Beginner Progression

    Start with just the arm extension — no leg movement. Or just the leg extension with both arms staying up. Let the client own the lumbar contact and the breathing pattern before adding complexity. I typically spend two to three weeks here with deconditioned clients or anyone with a history of back pain.

    Intermediate Progression

    Full contralateral (opposite arm and leg) extension as described above. Once a client can do 8 reps per side with a 3-second lowering tempo and zero lumbar lift, we move on.

    Advanced Progression

    Add resistance. A light cable or resistance band pulling the arm toward the floor dramatically increases the anti-extension demand. I also use ab rollers at this stage, which are essentially a standing dead bug pattern that demands the same anti-extension bracing under much higher load. The rollout is one of the most demanding core exercises in existence when done correctly — but it should not come before the client has demonstrated perfect dead bug mechanics, in my opinion.

    The Honest Caveat

    Here is where I will be straight with you: the dead bug is not a magic bullet, and I have had clients for whom even the beginner version was not appropriate at first. Individuals with certain types of herniated discs or acute sciatica sometimes find any loaded lumbar flexion — even passive — uncomfortable in this position. In those cases I pivot to standing anti-rotation work like Pallof presses or modified bird dogs, and I always recommend working with a physical therapist when pain is involved. I am a personal trainer, not a clinician. Know the difference.

    Additionally, the dead bug alone will not give anyone a six-pack. If visible abs are the goal, nutrition is doing 90% of that work. What the dead bug will do is build a resilient, functional core that supports every other movement you do in and out of the gym.

    What I Use and Recommend

    Once clients have mastered dead bug mechanics and are ready to progress their core training with equipment, here are the tools I actually reach for:

    For advanced anti-extension core training, the ab roller is unmatched. I have used and recommended the Vinsguir Ab Roller Wheel — Ab Workout Equipment for Abdominal & Core Strength Training for home gym clients who want a simple, durable tool that does the job without taking up space. If you want the version that includes a knee pad — which I strongly recommend for anyone training on hardwood floors or who has sensitive knees — the Vinsguir Ab Roller Wheel with Knee Pad Accessories is the better buy. Both are solidly built and far more stable than cheap single-wheel alternatives I have seen snap under load.

    For adding resistance to dead bug variations at home without a cable machine, I have been recommending the Upgrade Pedal Resistance Band with Handle. The foot-anchor design means you can mimic a cable pull without anchoring to a wall, which makes it practical for apartment or home gym training. Clients use it for banded dead bug variations, Pallof press alternatives, and seated core work. Versatile and inexpensive for what it delivers.

    The Bottom Line

    If I could only programme one core exercise for a client — any client, any age, any fitness level — it would be the dead bug. Not because it is trendy, not because it photographs well, but because it teaches the core to do its actual job: stabilise the spine under load while the rest of the body moves. I have watched this exercise reduce back pain, improve athletic performance, and finally give clients the core connection they have been missing after years of crunches and sit-ups that were not serving them.

    Start slow. Breathe deliberately. Keep your lower back on the floor. Progress only when you have genuinely earned it. That is not exciting advice, but in 15 years of coaching real people, it is the advice that has actually worked.