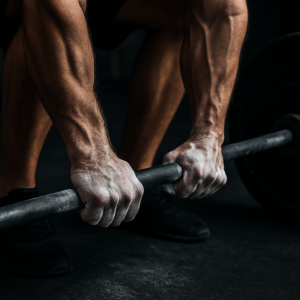
I’ve watched hundreds of lifters wince at the bottom of a deadlift, grab their lower back, and say some variation of: “I don’t know what’s wrong. I thought I was supposed to keep my spine neutral.”
They’re right that neutral spine matters. But knowing you need a neutral spine is like knowing you need to “eat healthy.” Technically true. Completely useless without specifics.
In eight years of training, I’ve found that lower back pain during deadlifts almost always traces back to one of four specific form errors. Not vague things like “bad posture.” Concrete, fixable mistakes that you can diagnose right now and correct with the exact drills I’m about to show you.
This isn’t the generic “warm up and keep neutral” advice. This is coaching-depth diagnosis and the precise corrective work that actually fixes the problem.
The Deadlift Back Pain Reality
Before we go deeper: some lower back pain from deadlifting requires professional assessment. If you have sharp, shooting pain (especially with nerve symptoms), pain that wakes you up at night, or pain that doesn’t improve within 48 hours, see a physical therapist or sports doctor. We’ll talk about when that’s necessary at the end.
But the majority of deadlift-related lower back discomfort I see? It’s mechanical. It’s form. And it’s fixable today.
MISTAKE #1: Rounding Your Lower Back (Lumbar Flexion Under Load)
Why This Happens
This is the most common error, and I see it constantly in commercial gyms. The lifter’s lower back rounds forward as the bar leaves the floor—sometimes slightly, sometimes dramatically. Their spine shifts from neutral into flexion exactly when they’re under the most load.
Three reasons this happens:
1. Weak spinal erectors. Your erector spinae muscles aren’t strong enough to maintain lumbar extension against the load. They fatigue, and the spine collapses.
2. Starting with hips too low. They’re initiating the deadlift like a squat—knees deeply bent, hips dropped. This anterior pelvic tilt at the start forces your lower back to round as you drive the bar up.
3. Trying to “squat” the deadlift. Some lifters think the deadlift is a leg exercise. They focus on quad drive and bend their knees excessively. The moment they do, the bar moves away from their body (we’ll cover this in Mistake #3), and lumbar rounding follows.
How to Diagnose This in Yourself
Film yourself from the side. Watch your lower back from the moment the bar leaves the floor until midthigh. Does your lower back angle flatten or decrease? Does your pelvis tuck under? If either happens, you’re rounding.
It doesn’t have to be extreme to cause pain. Even a 10-degree shift into flexion under heavy load stresses your intervertebral discs and ligaments.
The Fix: Three-Part Corrective Approach
Part 1: Regress to the Romanian Deadlift
The Romanian deadlift (RDL) trains hip hinge mechanics without the complexity of pulling from the floor. More importantly, it forces you to maintain a neutral spine because the movement pattern doesn’t tolerate rounding—if you round, you immediately feel the hamstring and lower back strain.
Here’s how to use it:
- Stand with feet hip-width apart, holding a barbell at hip height (or dumbbells at your sides)
- Maintain a slight knee bend—no more than 15 degrees
- Hinge at the hips by pushing your butt backward
- Keep your chest up and your head neutral (look at eye level)
- Lower until you feel a hamstring stretch or until your back rounds—whichever comes first
- Drive your hips forward to return to standing
- Prescription: 3 sets × 8 reps, 2-3 times per week, with lighter weight than you deadlift (50-60% of your deadlift max)
The RDL re-teaches your body that the deadlift is a hip hinge, not a squat. Do this for 2-3 weeks before returning to conventional deadlifts.
Part 2: Cat-Cow Spinal Awareness
Before you touch a barbell, your nervous system needs to remember what a neutral spine feels like. Cat-cow does this.
- Get on hands and knees
- In “cow” position: arch your lower back, chest up, gaze slightly upward
- In “cat” position: round your spine, tuck your chin
- Move slowly between the two, spending 1-2 seconds in each position
- Then find the midpoint—that’s neutral spine
- Hold that neutral position for 5 seconds
- Prescription: 2 sets × 10 reps (back and forth counts as 1), daily
This drill teaches proprioception. You’re learning to feel neutral spine so your body can maintain it under load.
Part 3: “Push the Floor Away” Cue
When you return to deadlifts, use this cue at the start of every rep:
“Push the floor away with your legs, not pull the bar up with your back.”
This mentally reframes the lift. Instead of thinking about pulling (which engages your back excessively), you’re thinking about extension. Your glutes and quads drive the floor away, your back stays isometrically neutral, and the bar follows.
Start with 50% of your normal deadlift weight. Film yourself. Make sure your lower back stays neutral from floor to lockout. Add weight only when you maintain that position for 5 consecutive reps.
MISTAKE #2: Hyperextending at Lockout (Over-Arching Your Back)
Why This Happens
You’ve pulled the bar to hip height with a neutral spine—good. But then you lean back aggressively at the top, arching your lower back into extension. This is usually caused by two things:
1. Overcompensating. Lifters who’ve struggled with lower back rounding sometimes overcorrect. They think more arch = safer. It doesn’t. Hyperextension under load is just as stressful as flexion.
2. Trying to “lean back” for lockout. Some coaches cue “lock your hips”—which is correct—but lifters misinterpret this as leaning their entire torso backward. The hips lock, but the lumbar spine hyperextends in the process.
How to Diagnose This
Film your lockout from the side. At the top of your deadlift, your body should form a straight line from your ankles to your head. If you’re tilting your shoulders backward away from your hips, you’re hyperextending.
You might also feel: sharp lower back pain at the top of the lift, or a sensation of your lower back “pinching.”
The Fix: Two Cues + One Drill
Cue 1: “Glute Squeeze”
At the top of the deadlift, actively squeeze your glutes hard. This engages your posterior chain and tells your brain “we’ve locked the hips.” But it locks them using glute activation, not spinal hyperextension.
The glutes and spinal erectors work together. When glutes contract powerfully, they naturally limit excessive lumbar extension.
Cue 2: “Stand Tall, Don’t Lean Back”
Verbal cue during lockout: “Stand tall—like you’re standing in an elevator with the president.” This prevents the backward lean.
The Drill: Lockout Holds with Light Weight
- Load the bar to 50% of your deadlift max
- Pull to lockout
- Hold for 3 seconds at the top while you actively squeeze your glutes
- Your body should form a straight line from ankles to head
- Lower under control
- Prescription: 4 sets × 3 reps (with 3-second holds), twice per week
The light weight gives you freedom to focus on positioning. The 3-second hold gives you time to feel what neutral lockout actually feels like.
MISTAKE #3: Bar Drifting Away From Your Body
Why This Happens
The bar should travel in a vertical line (or very close to it) during a deadlift. When the bar drifts away from your body—especially at the knees—your lower back assumes more of the load and your mechanics break down.
This happens because:
1. Weak lats. Your lats are responsible for keeping the bar tight to your body. Weak lats = no “shelf” for the bar to stay against.
2. Not engaging your upper back. Related to lats, but distinct. You’re not actively “pulling” the bar toward you at the start of the lift.
3. Starting with hips too low. (Again!) Low hips force your knees forward. The bar must arc around your knees. Chaos ensues.
How to Diagnose This
Film yourself from the side. Draw an imaginary vertical line from the bar at floor level. Does the bar stay on that line, or does it move away from your body as it passes your knees?
If it drifts forward, your lower back is working overtime to maintain the lift. This is a major lower back pain culprit.
The Fix: Lat Engagement + Straight-Arm Pulldowns
Cue: “Bend the Bar Around Your Legs”
This is a game-changer. At the start of the lift, imagine you’re bending the bar around your legs—creating tension in your lats. You’re not actually bending the bar, but the *intention* to do so activates your lats and creates that tight, body-close bar path.
Here’s how to practice it:
- Set up for a deadlift
- Before you pull, imagine the bar is rubber and you’re bending it around your shins and thighs
- This creates tension in your lats and shoulders
- Now pull
- Maintain that tension throughout the lift
Corrective Accessory: Straight-Arm Pulldowns
This isolates your lats and teaches them to work when loaded.
- Stand facing a cable machine with the rope or bar set at head height
- Grab with straight arms
- Pull down to your hips while keeping arms relatively straight
- You should feel lats working, not your arms
- Prescription: 3 sets × 12-15 reps, twice per week
The Long-Sleeve Test
Here’s a simple diagnostic: wear a long-sleeve shirt and deadlift. Tighter sleeves will be tight against your side when the bar is close to your body. Looser sleeves at the knees = bar drifting. Use this real-time feedback to adjust.
MISTAKE #4: Jerking the Bar Off the Floor (No Slack Pull)
Why This Happens
You bend over, grip the bar, and immediately yank. No pause. No setup. This is impatience combined with a lack of understanding about tension.
When you jerk the bar without building tension first, two things happen:
1. Your spine isn’t braced. Your core and erectors haven’t had time to stabilize. The sudden load catches your spine unprepared.
2. You lose mechanical efficiency. Deadlifts are most efficient when every muscle is pre-tensioned. A jerky start wastes energy and increases spinal stress.
How to Diagnose This
Watch yourself in a mirror or video. Is there a visible “jerk” or sudden acceleration at the start? Do you pause at all before pulling? If not, you’re yanking.
You might also feel: unpredictable pain (sometimes bad, sometimes fine) or a “catching” sensation in your lower back.
The Fix: The “Slack Pull” and Three-Second Setup Ritual
Understanding the Slack Pull
The slack pull means: take the slack out of the bar before you actually begin the lift. Here’s what it looks like:
- Set up with shins against the bar, shoulders over the bar, neutral spine
- Grip the bar firmly
- Take a deep breath into your belly
- Pull slightly with your legs/back—*not a full pull*, just enough to remove any give in the bar
- You should hear the bar settle on the plates. It’s quiet, no yanking
- Once the slack is out, that’s your true starting position. Now pull with intent
The slack pull pre-tensions your entire body. Your nervous system is ready. Your spine is braced. The actual pull is smooth, not jerky.
The Three-Second Setup Ritual
Discipline matters here. Use this before every rep:
Second 1: Assume position (shins at bar, shoulders over bar)
Second 2: Breathe deep into belly, remove slack
Second 3: Engage full tension, pull
It takes 3 seconds. This small pause is the difference between chronic lower back pain and a healthy spine.
Wedging Drill
To practice slack pull mechanics specifically:
- Load the bar to 50% of your max
- Set up and perform a slack pull (no full pull yet)
- Hold the tension position for 3 seconds
- Lower the bar
- Repeat 5 times, then do a full rep on the 6th rep
- Prescription: 3 sets × 6 (5 tension holds + 1 full rep), once per week
This trains your nervous system to always build tension before loading.
Alternative Deadlift Variations If Conventional Causes Pain
Sometimes, despite perfect form, conventional deadlifts irritate someone’s lower back. This isn’t weakness—it’s often anthropometry (lever lengths). If you’ve fixed the four mistakes above and still have pain, try these:
Trap Bar (Hex Bar) Deadlift
The trap bar places the handles at your sides instead of in front of you. That one change moves the load closer to your center of mass, which shortens the lever arm your lower back has to fight for the entire pull.
This isn’t just gym theory. Swinton and colleagues (Journal of Strength and Conditioning Research, 2011) put 19 competitive powerlifters through both bars across loads from 10% to 80% of 1RM. The hexagonal bar produced lower peak moments at the lumbar spine, hip, and ankle, and a higher peak moment at the knee. In plain English: the trap bar moves work off your lower back and onto your quads.
The same study found lifters pulled a heavier 1RM with the hex bar than the straight bar (265 kg vs. 245 kg on average), with greater peak force, velocity, and power. So you’re not “training less” by switching—you’re training differently.
How to program it:
- Make it your primary pull for 6-8 weeks
- Use the same set and rep scheme you’d use for conventional deadlifts
- Start about 10% below your conventional working weight—most lifters pass it within a few sessions
- Start with the high handles (shorter range of motion, less demand on the low back), then progress to the low handles as you tolerate it
Sumo Deadlift
Wide stance, hands gripping inside your knees. Your torso sits more upright and your hips start closer to the bar, which reduces how far forward you have to lean.
Cholewicki, McGill, and Norman (Medicine and Science in Sports and Exercise, 1991) analyzed 57 lifters competing at a national powerlifting championship. Sumo style produced roughly a 10% reduction in the L4/L5 joint moment and an 8% reduction in shear force compared to conventional pulling.
That’s a real reduction—but be honest about the size of it. Ten percent is meaningful, not miraculous. And sumo demands significantly more hip mobility and adductor strength. If your hips are stiff, all you’ll do is round your back in a wider stance and wonder why nothing improved.
Test it before you commit: spend two sessions pulling sumo at 60% of your conventional max. If the setup position feels open and stable, it’s worth an 8-week block. If you can’t get your hips down without your lower back rounding, your mobility isn’t there yet—stay conventional or use the trap bar.
Rack Pulls and Block Pulls
Elevate the bar to just below or just above the knee. You cut out the hardest part of the range of motion for your lower back—the initial break from the floor, where your torso angle is most horizontal and the lever arm on your spine is longest.
This is the right choice if your pain is specifically off the floor and disappears once the bar passes your knees.
- Set pins or blocks so the bar starts 2-4 inches below your kneecap
- Same setup rules apply—neutral spine, lats engaged, slack pulled
- Prescription: 4 sets × 5 reps at 70-80% of your conventional max, once per week
- Lower the pins by an inch every 2-3 weeks as tolerance improves, until you’re pulling from the floor again
Romanian Deadlift as Your Primary Pull
If nothing from the floor feels acceptable, stop pulling from the floor. The RDL from a standing start loads your hamstrings and glutes hard, teaches the hinge, and never puts your spine in the deep, horizontal torso angle that a floor pull requires.
You will not lose meaningful strength by running RDLs as your main hinge for a training block. You’ll usually come back to conventional deadlifts stronger, because you spent eight weeks building the exact muscles that were failing you.
Prescription: 4 sets × 6-8 reps, twice per week, progressing weight weekly.
When to Stop Self-Diagnosing and See a Professional
I promised at the top that we’d cover this, because everything above assumes your problem is mechanical. Sometimes it isn’t.
Stop training the movement and get assessed if you have any of the following:
- Nerve symptoms. Pain that shoots down your leg, numbness, tingling, or pins-and-needles anywhere below the buttock. This suggests nerve root involvement, not a muscular issue, and no amount of cueing will fix it.
- Weakness in the leg or foot. Trouble lifting the front of your foot, or a leg that gives way. This is a red flag, not a form problem.
- Pain that wakes you at night or is present when you’re completely at rest and unloaded.
- Pain that doesn’t improve at all after 5-7 days of backing off, or that’s getting worse week over week.
- Any change in bladder or bowel control, or numbness in the saddle region. This is a medical emergency—go to an emergency department, not a physical therapist.
- Pain following a specific traumatic event—a fall, a crash, a rep where you felt something acute give way.
For everything else—stiffness, soreness, a low back that feels “tired and achy” after pulling, discomfort that eases within a day or two—the four fixes above are almost always the answer.
One more thing worth saying plainly: seeing a physical therapist is not an admission of failure. The best lifters I’ve worked with have a PT on speed dial. Getting an assessment early usually means a two-week detour instead of a six-month one.
Your Next Four Weeks
Don’t try to fix all four mistakes at once. You’ll do a mediocre job on all of them.
Here’s the order I use with people:
Week 1: Film three sets of deadlifts from the side at your normal working weight. Watch them once for each of the four mistakes—rounding, hyperextension, bar drift, jerking. Write down which ones you actually have. Most people have two.
Weeks 1-2: Drop to 50% of your working weight. Fix the setup problems first—the slack pull and the three-second ritual from Mistake #4. These take the least time to learn and they make the other three easier to correct.
Weeks 2-4: Add the corrective work for whichever of Mistakes #1-3 showed up on your video. RDLs and cat-cow for rounding. Lockout holds for hyperextension. Straight-arm pulldowns and the “bend the bar” cue for bar drift.
Week 4: Film yourself again at the same 50% weight. Compare it to your week 1 video. If the position holds for five consecutive reps, start adding weight back—no more than 10% per week.
Most lifters are back to their old working weight within 6-8 weeks, pulling it without pain, and stronger than they were because they finally fixed the leak instead of training around it.
Deadlifts don’t hurt backs. Specific, identifiable, correctable errors hurt backs. Now you know which four to look for.
The Belt I Use During Loaded Rehab Work
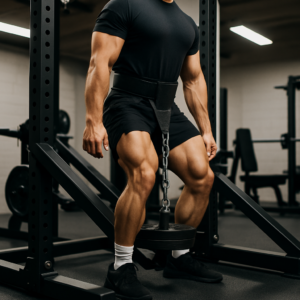
Once you’ve diagnosed which of these four mistakes you’re making and started the corrective drills, you need to load the pattern again—but safely. I have people wear a quality lifting belt during this reload phase to maintain intra-abdominal pressure and reinforce the neutral spine position while their nervous system re-learns the movement. It’s not a crutch; it’s a feedback tool that lets you train through the fix without compensating into old patterns.
Perform 3 sets × 8 reps, 2-3 times per week, using 50-60% of your deadlift max. Do this for 2-3 weeks before returning to conventional deadlifts. The RDL teaches your body that the deadlift is a hip hinge, not a squat, and forces you to maintain neutral spine. The slack pull means taking the slack out of the bar before you actually begin the lift. Set up with shins at the bar and shoulders over it, then pull slightly with your legs and back—just enough to remove any give in the bar. Once the slack is out, that’s your true starting position before pulling with intent. Load the bar to 50% of your deadlift max. Perform 4 sets × 3 reps with 3-second holds at the top, twice per week. Actively squeeze your glutes during the hold. The light weight gives you freedom to focus on positioning and helps you feel what neutral lockout actually feels like. Wear a long-sleeve shirt and deadlift. Tighter sleeves against your side indicate the bar is close to your body. Looser sleeves at the knees mean the bar is drifting away, which overloads your lower back and breaks down mechanics.Frequently Asked Questions
How many sets and reps for Romanian deadlifts to fix lower back rounding?
What does the slack pull mean in deadlifting?
How much weight should I use for lockout hold drills?
What does the long-sleeve test reveal about bar path?
About This Article

Written by Jordan Ellis. Jordan Ellis isn't a certified personal trainer — just someone who's been genuinely obsessed with training for over eight years and turned it into building smarter home gyms. He focuses on home fitness: effective training spaces, equipment that earns its price, and programs that work in a spare room or basement, not just a commercial gym. More about this site.
Scope and limits. Jordan is not a certified personal trainer, and nothing here is medical advice. Check with a physician before starting a new program, and prioritize form over load on every lift described.
Verify this against a primary source
Specifics change, and your situation may differ from the one described here. These are the authorities worth checking directly:
- Physical Activity Guidelines for Americans (HHS) — the federal physical activity guidelines
- American College of Sports Medicine — exercise prescription and position stands
- NSCA — strength and conditioning research