The Rotator Cuff Rehab Guide That Actually Gets You Back Under the Bar
Let me be straight with you: most rotator cuff rehab advice online is garbage for lifters.
I say this not to be inflammatory, but because it’s true. You’ll find endless articles telling you to avoid overhead movements for six months, do light band work, and basically become a sedentary person. That guidance works great if you’re 65, just had surgery, and your primary activity is walking to the mailbox.
But if you’re someone who actually trains—someone who benches, presses, and pulls heavy things—that cookie-cutter approach will atrophy your strength, kill your progress, and often prolong your recovery unnecessarily.
The truth is that most rotator cuff issues in lifters aren’t full tears requiring surgical repair. They’re impingements and tendinopathy—inflammatory conditions that respond well to intelligent load management and targeted strengthening. You don’t have to stop lifting. You have to train smarter.
This guide is specifically for active people dealing with a rotator cuff tweak who want to keep making progress. If that’s you, read on.
Understanding the Spectrum: Not All Rotator Cuff Issues Are Created Equal
Before we talk about fixing your shoulder, you need to know what’s actually wrong with it.
The rotator cuff consists of four small muscles—supraspinatus, infraspinatus, teres minor, and subscapularis—that stabilize your shoulder joint. Injuries to these muscles range from minor irritation to complete tears, and the difference matters enormously for how you should train.
Impingement and Tendinopathy (Most Common in Lifters)
This is the category most lifters fall into. The rotator cuff tendons become inflamed, typically from repetitive overhead stress or poor movement mechanics. You’ll feel pain with specific movements—usually overhead pressing or wide-grip pulling—but you won’t have sudden weakness or night pain. The pain is reproducible and responsive to load modification.
Good news: this is almost always manageable without stopping all training. You modify movements, strengthen the stabilizing muscles, and you’re back to normal in 4-12 weeks.
Partial Tear
Some fibers of the rotator cuff tear, but not completely through. This is more serious than impingement but less serious than a full tear. You might experience persistent pain even at rest, weakness with certain movements, and the pain doesn’t resolve quickly with rest.
Partial tears sometimes require imaging to confirm and often benefit from more conservative loading patterns, though many partial tears still respond well to appropriate training modifications.
Full Tear
The tendon is completely severed. This typically requires surgery and a much longer, more conservative recovery protocol. You’ll usually have sudden, significant weakness—you might not be able to press overhead at all or hold weight away from your body.
When to Get Imaging
Here’s what I tell people: if your shoulder pain hits any of these markers, go get an ultrasound or MRI before proceeding:
- Persistent pain lasting more than 4 weeks that doesn’t respond to load modification
- Night pain that wakes you up or prevents sleep
- Sudden weakness in a specific movement (like inability to press weight you normally handle)
- Pain following a specific traumatic incident (fall, heavy catch, sudden jerk)
If your pain is recent, reproducible with certain movements only, and gets better with rest and modification, you can usually start rehab immediately without imaging. But if you’re not improving after two weeks of smart training modifications, get it checked out.
The Movements That Wreck Shoulders (And Why)
Certain exercises create mechanical situations that aggravate rotator cuff pathology. Understanding why helps you understand what to avoid and what to substitute.
Behind-the-Neck Pressing
When you press a bar down from behind your neck, your shoulder is placed in extreme external rotation while under load. This position places enormous stress on the anterior shoulder capsule and the rotator cuff muscles trying to stabilize it. For someone with existing rotator cuff irritation, this is especially problematic because the tendons are already inflamed. You’re essentially jamming an irritated structure into its worst position.
Solution: Replace with landmine pressing or half-range overhead pressing with a barbell.
Upright Rows
The upright row pulls the humerus into internal rotation and adduction while simultaneously impinging the supraspinatus tendon against the acromion process. It’s a biomechanically poor movement that many lifters can tolerate, but if you have existing shoulder irritation, it’s one of the fastest ways to aggravate it further.
Solution: Replace with face pulls, band pull-aparts, or high cable rows where your elbows stay wider.
Wide-Grip Bench Press with Excessive Elbow Flare
A reasonably wide grip is fine—it’s actually more anatomically sound for most people than a narrow grip. But when grip width exceeds 1.5x shoulder width and your elbows flare perpendicular to your body, you’re placing excessive anterior shoulder stress. The wider grip and increased elbow flare creates more demand on your anterior deltoid and shoulder capsule, stressing structures already dealing with irritation.
Solution: Reduce grip width, tuck elbows to 45-75 degrees, or switch to floor press which limits range of motion and reduces the position’s stress on the anterior shoulder.
Heavy Dips with Forward Lean
Dips are an excellent movement, but when done with heavy weight and forward lean, they create intense stress on the shoulder joint in an already compromised position. The forward lean specifically increases anterior shoulder stress rather than shifting work to the chest as intended.
Solution: Reduce weight, reduce range of motion (use a box to limit descent), or temporarily substitute with push-ups or floor press.
The Pain-Free Training Approach: Modify, Don’t Quit
This is the critical mindset shift for lifters with rotator cuff issues: you don’t have to stop lifting. You have to modify temporarily until tissues adapt.
The principle here is called “relative rest” or “pain-free training.” You reduce the stressor (load, range of motion, or intensity) just enough that you can train without aggravating the injury, while still providing stimulus for adaptation and preventing detraining.
Practical Modifications
Flat Bench to Floor Press: Floor press reduces range of motion by about 3-4 inches, which eliminates the bottom position that stresses the anterior shoulder. You can maintain pressing strength and volume without aggravating shoulder pain. Use 70-80% of your normal flat bench weight.
Barbell Overhead Press to Landmine Press: The landmine press removes the need for shoulder external rotation to stabilize the bar, reducing rotator cuff demand while maintaining overhead pressing stimulus. Landmine pressing is also more forgiving on the shoulder joint overall.
Wide-Grip Pull-ups to Neutral-Grip Pull-ups or Chin-ups: Wide grip positions increase external rotation demand and anterior shoulder stress during the pull. Neutral grip or chin-ups reduce this stress while maintaining pulling strength. You might also substitute with assisted machine rows or high cable rows.
Reduce Weight, Increase Reps Temporarily: A 4-week block of 12-15 rep range at 60-70% of your normal weight maintains muscular endurance and strength while reducing joint stress. The reduced load is often enough to allow pain-free training while tissues adapt.
The goal is to train hard enough that you’re not losing fitness, but intelligently enough that you’re not re-aggravating the issue every session. Think of this as a 4-12 week training block, not a permanent change.
The Rotator Cuff Rehab Protocol: Four Phases
Effective rotator cuff rehabilitation isn’t mysterious. It’s progressive, systematic, and evidence-based. A 2016 systematic review by Lewis examining exercise therapy for rotator cuff tendinopathy found that progressive loading and progressive strengthening were the most important factors in recovery—not rest, not surgery, but intelligently increasing demand on the tissue.
Here’s the protocol I use with lifters.
Phase 1: Pain Management (Weeks 1-2)
The goal of Phase 1 is to establish pain-free movement patterns and reduce acute inflammation.
Isometric External Rotation Hold: Lie on your side with the injured arm bent at 90 degrees (elbow at your ribcage, forearm pointing forward). Use your other hand to hold your forearm in place or simply tighten the rotator cuff without movement. Hold for 30 seconds. The key is creating muscular tension without any joint movement. Do 4 sets, resting 60 seconds between sets. Do this 3-4x per week.
Wall Slides: Stand with your back against a wall, feet 6 inches away. Place your arms in a goal-post position (elbows bent 90 degrees, shoulders abducted 90 degrees) and slowly slide your arms up the wall toward a fully overhead position, maintaining contact with the wall. Go as high as pain allows. Slide back down slowly. Do 3 sets of 10 reps. This reinforces proper scapular positioning during shoulder movement.
Scapular Setting (Wall Angels): Same starting position as wall slides, but this time focus on squeezing your shoulder blades together and down as you move. Move slower, deliberately retracting scapulae as you go. Do 3 sets of 8-10 reps. This is more about motor control than range of motion.
Phase 2: Isotonic Strengthening (Weeks 3-4)
Now that pain-free movement is established, begin building strength with controlled movements and external resistance.
Side-Lying Dumbbell External Rotation: Lie on your side, affected arm on top. Bend your elbow to 90 degrees with the forearm across your body (internally rotated). Rotate the forearm upward as far as pain allows, using a light dumbbell (start with 2.5-5 lbs). Control the eccentric portion. Do 3 sets of 15 reps. Progress by adding 2.5 lbs when the movement feels easy.
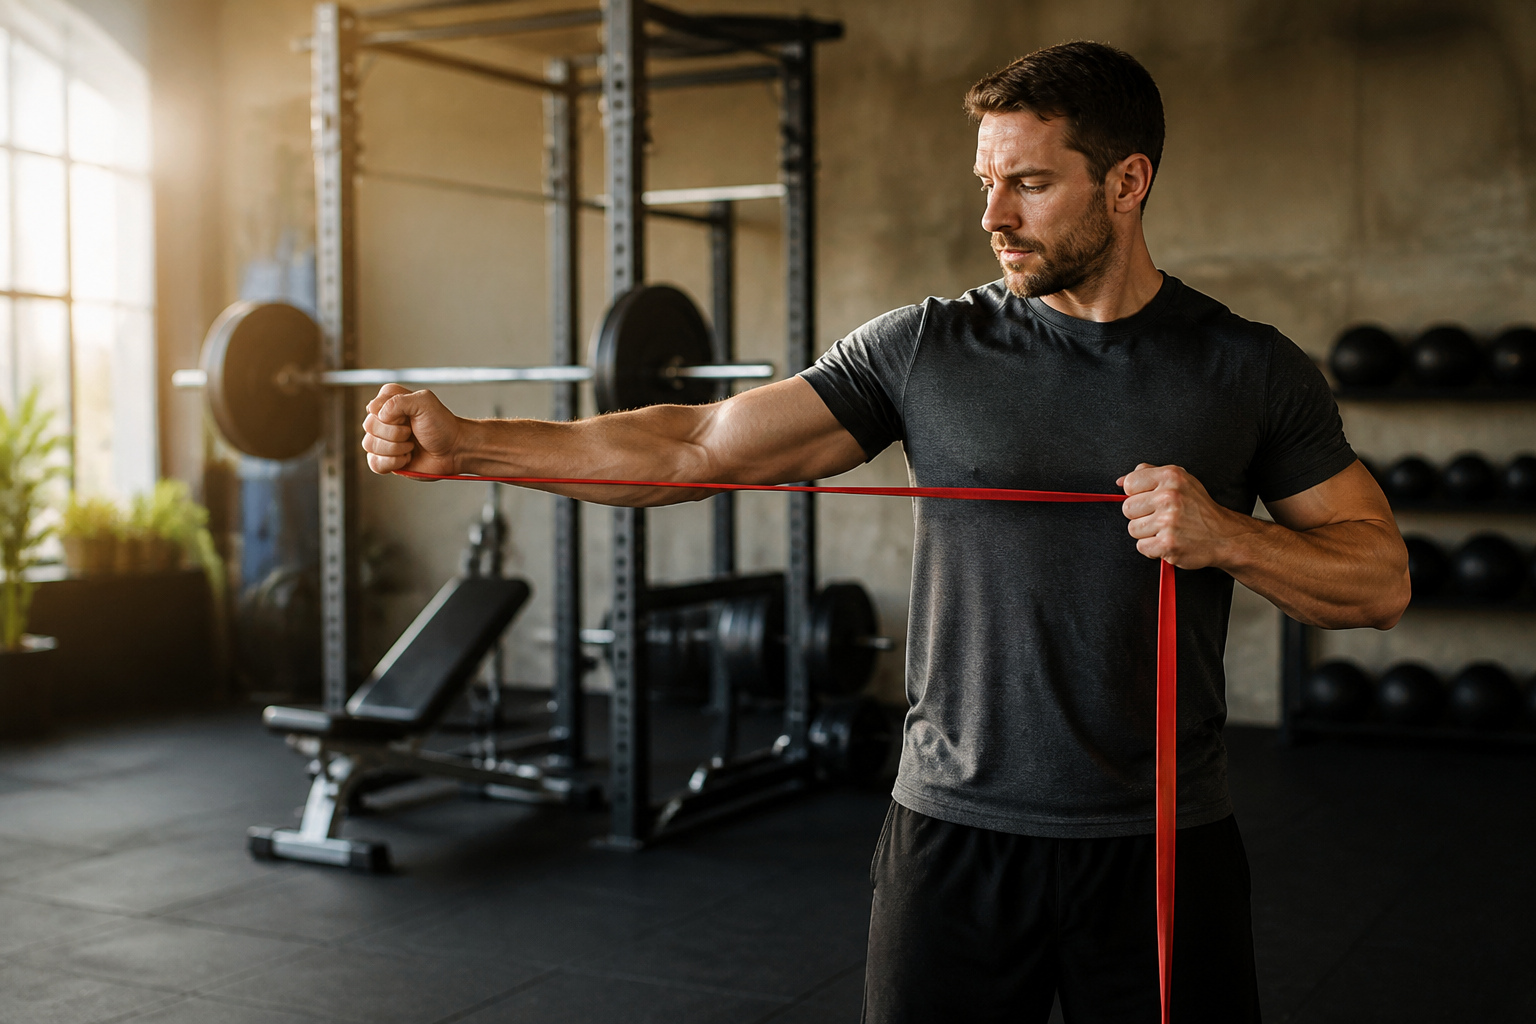
Band Pull-Aparts: Hold a resistance band at chest height with arms straight. Pull the band apart by abducting your shoulders, squeezing shoulder blades together. Return to start. Do 3 sets of 20 reps. Use a light resistance band—this is about high-rep stimulation and scapular control, not max strength.
Face Pulls with Slow Eccentric: Using a rope attachment on a high cable pulley, pull the rope toward your face with elbows high. At the end position, pause, then lower slowly over 3-4 seconds. Do 3 sets of 15 reps. The emphasis on the eccentric (lowering) phase creates significant strengthening stimulus while remaining relatively pain-free.
Prone Y-T-W Raises: Lie prone on an incline bench (so your chest is supported). Perform three movements without weight: arms in a Y position and raise to shoulder height (10 reps), then a T position with arms perpendicular to body (10 reps), then a W position with elbows bent 90 degrees (10 reps). Do 3 sets of the Y-T-W sequence. This strengthens the posterior chain and rear deltoids while keeping stress minimal.
Phase 3: Integration (Weeks 5-8)
Begin reintroducing complex movements and dynamic stabilization demands. This is where you start training more like an actual lifter again.
Turkish Get-Ups: Start with a very light kettlebell (8-12 kg). The Turkish get-up is exceptional for shoulder stability under dynamic conditions. The movement demands that your rotator cuff stabilize the shoulder through multiple planes while you’re moving. Do 3 sets of 3-5 reps per side, focusing on perfect movement quality.
Bottoms-Up Kettlebell Press: Hold a kettlebell in one hand, bell down (upside down). The unstable position demands intense rotator cuff activation to prevent the bell from flipping. Press overhead. Do 3 sets of 5-8 reps per side with a light kettlebell (12-16 kg). This builds shoulder stability in overhead position without heavy load.
Overhead Carries: Holding a kettlebell or dumbbell overhead in one hand, walk for 30-40 seconds. The demanding stabilization requirement trains the rotator cuff to work as an actual stabilizer, not just under load. Do 3-4 sets per side. This is surprisingly effective and builds shoulder resilience.
During this phase, begin progressively reintroducing your normal pressing movements—but with modifications. If you were doing flat bench, start with floor press at 50% load for sets of 8-10. If you were doing barbell overhead press, start with landmine press at 60% load. Gradually increase load by 5-10 lbs per week if pain-free.
Phase 4: Return to Full Training (Weeks 9-12)
By now, pain should be minimal or resolved. Progressively reintroduce full range of motion and normal loading with the permanent prehab additions (see below).
If you’ve been doing floor press, progress back to flat bench. If you’ve been doing landmine press, return to barbell overhead pressing. Gradually increase load, decrease reps to your normal training range.
The key here: do NOT skip directly back to what hurt you originally. Progress gradually. A lifter who went from heavy bench pressing to floor press should spend 2-3 weeks building back with flat bench before attempting 1RMs or heavy sets of low reps.
The Permanent Prehab Addition: Non-Negotiable
This is the most important section of this guide. Most lifters rehab their shoulder, return to normal training, and then re-injure it within months because they don’t address the root cause: inadequate rotator cuff prehab.
Here’s what I tell every lifter I work with: You must do face pulls and band pull-aparts at the beginning of every upper body session. Forever. Not negotiable. It takes 3 minutes and prevents months of rehab.
The research is unambiguous on this. Regular rear deltoid and external rotator work prevents impingement and tendinopathy. Lewis’s 2016 systematic review confirmed that progressive strengthening of the rotator cuff and posterior shoulder is one of the primary protective factors against recurrence.
After your main warmup, before your primary lifts, do:
Face Pulls: 3 sets of 15-20 reps, with controlled tempo. Use moderate resistance. Goal is 60+ total reps per session.
Band Pull-Aparts: 3 sets of 20 reps. Use a light or medium band. These take 2 minutes and are incredibly effective.
That’s it. 3 minutes. Every upper body session. If you do this, your likelihood of dealing with another rotator cuff issue drops dramatically. If you skip it because you’re “too busy,” you’ll eventually find yourself back where you started.
The Bench Press Shoulder Saver Checklist
Bench press is the most common aggravator of shoulder issues in lifters. If you’re dealing with shoulder pain, your bench pressing technique is probably the culprit. Here’s the non-negotiable checklist:
- Retract Scapulae: Your shoulder blades must be pinned down and back into the bench. If they’re protracted (rounded forward), you lose stability and load transfers to the rotator cuff.
- Physical Activity Guidelines for Americans (HHS) — the federal physical activity guidelines
- American College of Sports Medicine — exercise prescription and position stands
- NSCA — strength and conditioning research
The Tool That Makes Loaded Rehab Actually Sustainable
During the mid-phase work I described—when you’re reintroducing load without barbell complexity—I have people use resistance bands to dial in scapular stability and rotator cuff endurance without the joint stress of heavy pressing. The five resistance levels let you match your actual capacity that day instead of forcing a fixed barbell weight, which is exactly what intelligent load management looks like in practice.
Most impingements and tendinopathy—the most common rotator cuff issues in lifters—resolve in 4-12 weeks with intelligent load management and targeted strengthening. Recovery time depends on severity and how consistently you follow the protocol. Full tears requiring surgery need much longer, more conservative recovery. Yes. Most rotator cuff issues in lifters aren’t full tears; they’re impingements and tendinopathy that respond well to load modification. You don’t have to stop lifting—you train smarter by reducing weight, range of motion, or intensity just enough to train pain-free while tissues adapt. Avoid behind-the-neck pressing, upright rows, wide-grip bench press with excessive elbow flare exceeding 1.5x shoulder width, and heavy dips with forward lean. These positions place excessive stress on irritated rotator cuff structures. Substitute with landmine pressing, face pulls, floor press, and reduced range movements. Do face pulls for 3 sets of 15-20 reps and band pull-aparts for 3 sets of 20 reps before your main lifts. This takes 3 minutes and dramatically reduces your likelihood of rotator cuff issues. Research confirms that progressive strengthening of the rotator cuff and posterior shoulder is a primary protective factor against recurrence.Frequently Asked Questions
How long does rotator cuff rehab typically take for lifters?
Can I keep lifting with rotator cuff impingement?
What exercises should I avoid with shoulder pain?
What prehab should I do every upper body session?
About This Article

Written by Jordan Ellis. Jordan Ellis isn't a certified personal trainer — just someone who's been genuinely obsessed with training for over eight years and turned it into building smarter home gyms. He focuses on home fitness: effective training spaces, equipment that earns its price, and programs that work in a spare room or basement, not just a commercial gym. More about this site.
Scope and limits. Jordan is not a certified personal trainer, and nothing here is medical advice. Check with a physician before starting a new program, and prioritize form over load on every lift described.
Verify this against a primary source
Specifics change, and your situation may differ from the one described here. These are the authorities worth checking directly: